Start Your Microgreens Journey: A Beginner’s Step-by-Step Plan
Starting my microgreens journey has been an exciting experience! First, I learned what microgreens are and their amazing health benefits—packed with vitamins and nutrients, they elevate any dish. I chose organic seeds like radish and basil and gathered essential supplies like trays and light sources. Preparing the growing medium and ensuring proper watering and light were crucial steps. Harvesting was a joy, and I love adding them to my meals. There’s so much more to explore!
Key Takeaways
- Choose organic seeds like radish, beet, or basil for high germination rates and better flavor profiles.
- Prepare a sterile growing medium such as coconut coir or organic potting soil for healthy microgreens.
- Maintain consistent moisture by gently misting the soil daily and ensuring good air circulation.
- Harvest microgreens when they reach 1-3 inches tall using clean scissors to prevent bruising.
- Rinse harvested microgreens, store them in a breathable container, and refrigerate promptly to preserve freshness.
Understanding Microgreens: What They Are and Their Benefits
When I first discovered microgreens, I was amazed by how these tiny plants pack a punch in both flavor and nutrition. Microgreens are the young seedlings of edible vegetables and herbs, harvested just after the first true leaves appear.
They’re not just cute on a plate; they’re nutrient powerhouses! Packed with vitamins, minerals, and antioxidants, microgreens can elevate the nutritional profile of any meal. Plus, they come in a variety of flavors, from spicy radish to sweet basil, adding depth to dishes.
I started incorporating them into salads, sandwiches, and even smoothies. Growing microgreens at home is simple and requires minimal space, making it accessible for anyone looking to boost their culinary creativity and health.
Choosing the Right Seeds for Your Microgreens
Exploring the world of microgreens starts with selecting the right seeds. I’ve found that choosing organic seeds is a great way to ensure quality and avoid pesticides. Popular options include radish, beet, and basil seeds, each offering unique flavors and colors.
When I first started, I experimented with a few varieties to see what suited my taste and growing conditions. It’s also essential to check for seed viability; fresh seeds typically yield better results. I recommend purchasing from reputable suppliers to guarantee high germination rates.
Lastly, consider your growing space and light availability—some seeds thrive in low light while others need bright conditions. With the right seeds, you’ll be well on your way to enjoying delicious microgreens!
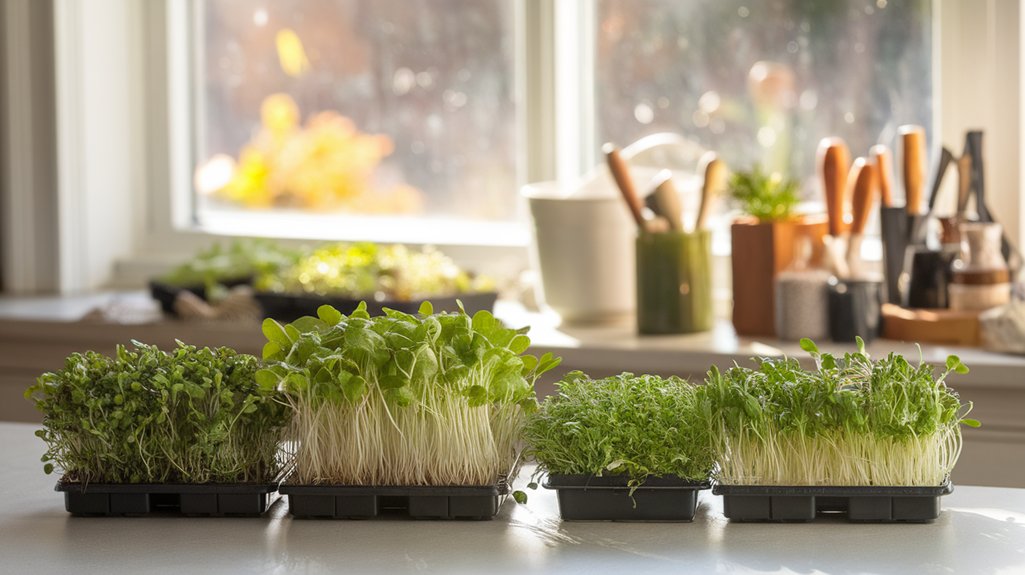
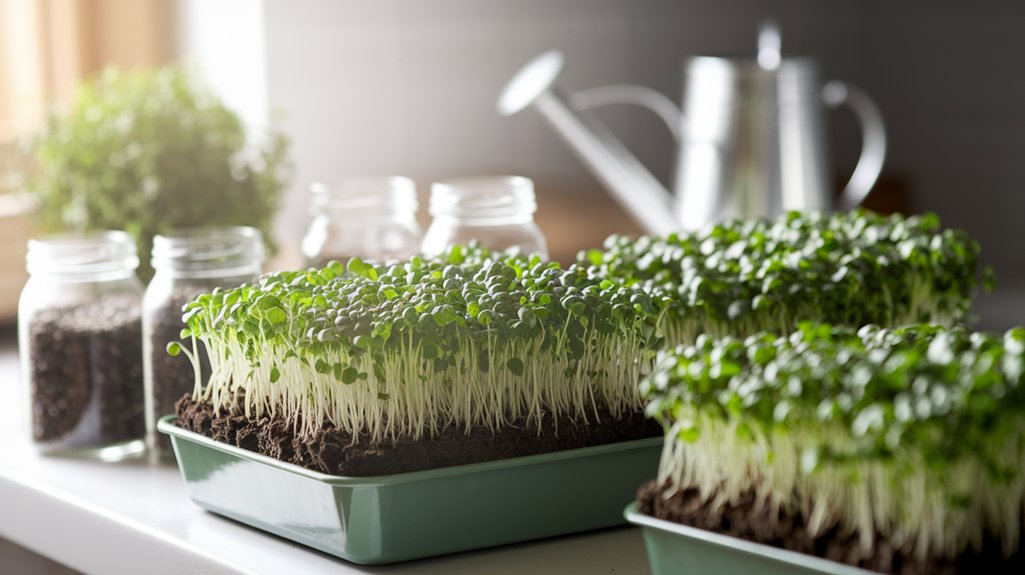
Essential Supplies You’ll Need to Get Started
Before diving into the exciting world of growing microgreens, it’s crucial to gather the essential supplies that will set you up for success. Here’s a simple list to help you get started:
| Supply | Purpose | Where to Buy |
|---|---|---|
| Seeds | The foundation of your microgreens | Local garden center |
| Growing trays | Containers to hold your medium | Online retailers |
| Spray bottle | For gentle watering | Local home goods store |
| Light source | To provide adequate light | Hardware stores |
With these essentials in hand, you’ll be ready to embark on your microgreens journey. Just remember, having the right tools makes all the difference!
Preparing Your Growing Medium
Typically, I find that choosing the right growing medium is a game-changer for microgreens. It directly impacts their growth and health.
When preparing, I usually consider a few key options that work wonders:
- Coconut Coir: It’s eco-friendly and retains moisture well.
- Seed-Starting Mix: Lightweight and nutrient-rich, perfect for young plants.
- Organic Potting Soil: Offers essential nutrients, but make sure it’s fine-textured.
- Hydroponic Mats: Ideal for those who prefer a soil-less approach.
I mix and match these mediums based on what I’m growing.
Always ensure it’s sterile to prevent diseases. A good medium sets the foundation for a thriving microgreens garden, and trust me, you’ll see the difference!
Planting Your Microgreens Seeds

Now that we’ve prepared our growing medium, it’s time to plant those microgreens seeds!
I’ll share some key tips for selecting the right seeds, how to ensure your soil is ready, and the best techniques for planting.
Let’s get those tiny greens on their way to thriving!
Seed Selection Tips
Choosing the right seeds is essential for a successful microgreens garden. I’ve learned that selecting quality seeds makes all the difference in flavor and growth.
Here are some tips I follow when picking my seeds:
- Opt for organic seeds: They’re free from harmful chemicals and better for my health.
- Choose fast-growing varieties: Look for options like radish, broccoli, or arugula to enjoy quick results.
- Consider flavor: I love experimenting with different tastes; some seeds are milder while others pack a punch!
- Check for germination rates: High germination rates mean more successful sprouts, so I read reviews before buying.
With the right seeds in hand, I’m ready to start my microgreens journey!
Soil Preparation Steps
With my seeds selected, it’s time to prepare the soil for my microgreens. I start by choosing a high-quality, organic potting mix. This mix is essential for providing the right nutrients and drainage.
Next, I fill my trays or containers about three-quarters full, leaving some room for the seeds. I gently level the soil, ensuring it’s compact but not too dense, which allows for proper root growth.
After that, I moisten the soil with a spray bottle, making sure it’s evenly damp but not soggy. For extra assurance, I sift the soil to remove any large clumps or debris.
Once I’ve prepped the soil, I’m ready for the exciting part—planting my microgreens seeds!
Ideal Planting Techniques
As I prepare to plant my microgreens seeds, I carefully follow a few key techniques to ensure successful germination and growth. First, I make sure to evenly distribute the seeds across the moistened soil. This helps them get the right amount of moisture and light. Next, I gently press them down for good soil contact.
Here are some other tips I always keep in mind:
- Use high-quality seeds for better yields.
- Mist the soil lightly rather than overwatering.
- Cover seeds lightly with a thin layer of soil or vermiculite.
- Provide adequate light, either natural or grow lights, for optimal growth.
Watering and Caring for Your Microgreens
Although growing microgreens can be an exciting venture, maintaining their health through proper watering and care is essential for a successful harvest. I’ve found that keeping the soil consistently moist is key, but be careful not to overwater.
Using a spray bottle works wonders, allowing me to gently mist the soil without saturating it. I check the moisture level daily; if the top inch feels dry, it’s time to water.
Additionally, I avoid letting the microgreens sit in standing water, as this can lead to mold. I also recommend providing good air circulation, which helps prevent diseases.
Light Requirements for Optimal Growth
Light is the lifeblood of your microgreens’ growth. Without adequate light, your tiny plants won’t thrive, and you might miss out on that vibrant flavor and nutrition.
I’ve learned a few key points that really help boost their growth:
- Natural Light: Place your microgreens near a sunny window for at least 4-6 hours daily.
- Artificial Light: If natural light’s limited, consider using grow lights, ideally LED, for 12-16 hours a day.
- Light Height: Keep lights about 2-4 inches above your microgreens to prevent leggy growth.
- Light Spectrum: Look for full-spectrum lights to provide the right wavelengths for photosynthesis.
When and How to Harvest Your Microgreens
Now that your microgreens have grown strong, it’s time to think about when and how to harvest them for the best flavor and nutrition.
I’ll share the optimal timing for harvesting, some effective techniques, and essential tips for post-harvest care.
Let’s make sure you get the most out of your tiny greens!
Optimal Harvest Timing
Timing is crucial when it comes to harvesting microgreens, as it directly influences their flavor, texture, and nutritional value. I’ve learned that the ideal time to harvest is typically between 7 to 21 days after germination, depending on the variety.
Here are a few tips to help you determine the optimal harvest time:
- Look for true leaves: Wait until the first set of true leaves appears.
- Check the height: Most microgreens should be around 1-3 inches tall.
- Assess the color: Vibrant colors usually indicate readiness.
- Taste test: A little nibble can tell you if they’re flavorful and fresh.
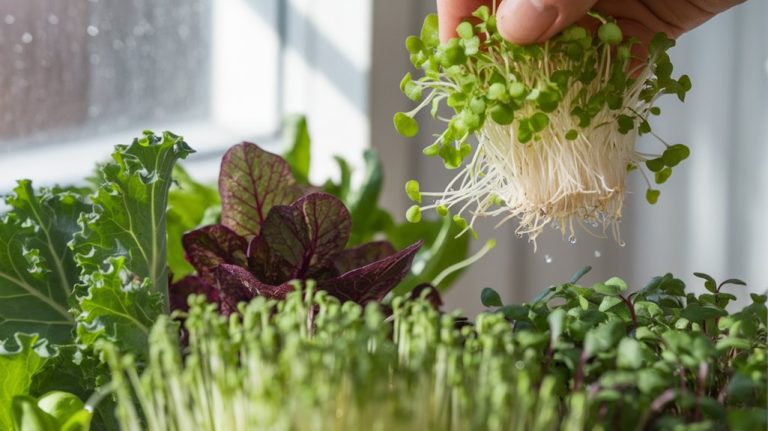
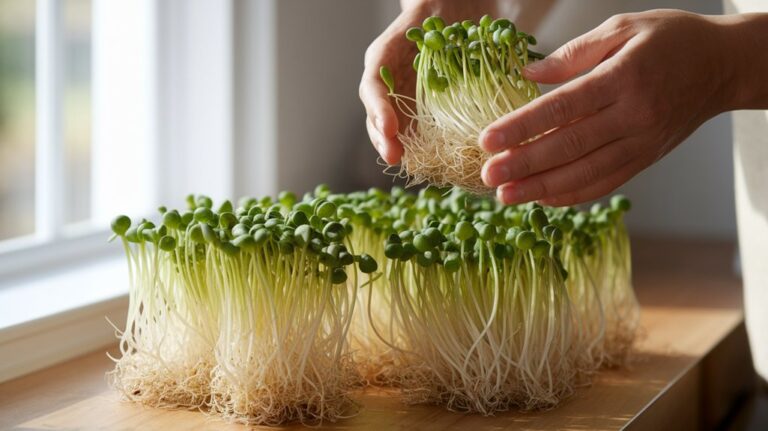
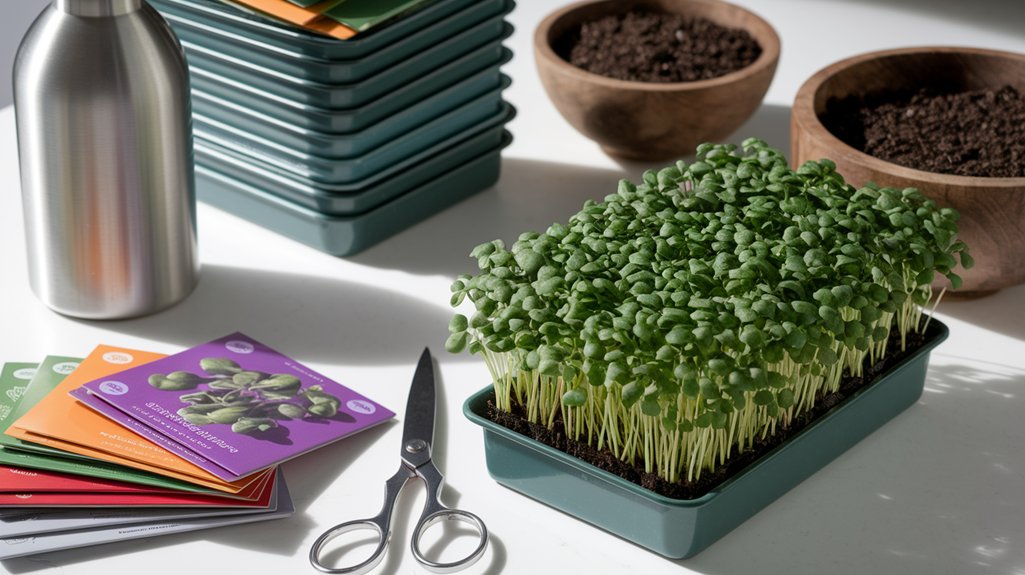
Harvesting Techniques Explained
When it comes to harvesting microgreens, knowing the right techniques can make all the difference. I usually wait until my microgreens are around 2 to 3 inches tall, with vibrant leaves and stems.
To harvest, I grab a clean pair of scissors and gently cut just above the soil line. This method helps preserve the remaining roots for future growth, if you’re using a continuous cropping technique.
I like to work in the morning when the moisture content is higher; this keeps the greens crisp. Be sure to gather them in a clean container, avoiding any bruising.
Once harvested, I place them in a cool, shaded area until I’m ready to use them. Happy harvesting!
Post-Harvest Care Tips
Although the excitement of harvesting microgreens is palpable, proper post-harvest care is crucial to maintain their freshness and flavor.
Once I’ve cut my microgreens, I focus on a few essential steps to ensure they stay vibrant and delicious.
- Rinse gently: I lightly rinse them under cool water to remove any soil or debris.
- Dry properly: I use a salad spinner or paper towel to remove excess moisture, preventing mold.
- Store smartly: I place them in a breathable container, like a paper bag or a perforated plastic container.
- Refrigerate promptly: I make sure to refrigerate them immediately, keeping the temperature low to preserve their quality.
These simple steps keep my microgreens fresh and ready to enjoy!
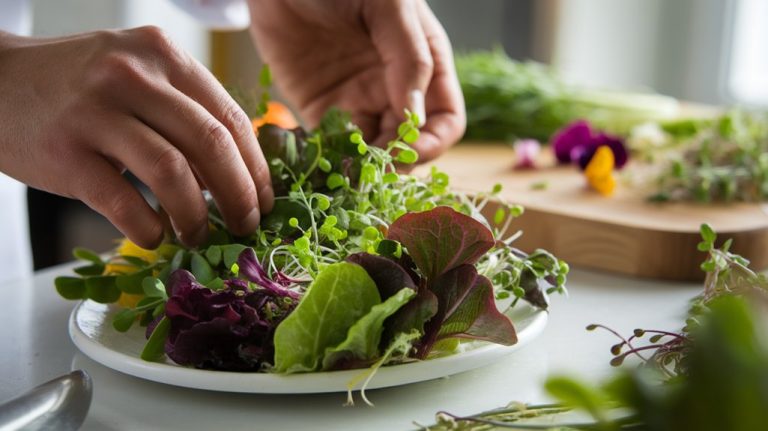
Enjoying and Using Your Fresh Microgreens in Meals
Since I’ve started growing microgreens, I’ve discovered just how versatile they can be in my meals. I love tossing a handful of arugula microgreens into my salads for a peppery kick or using sunflower microgreens to add a crunchy texture to sandwiches.
They’re perfect as a garnish on soups or as a colorful topping for omelets. I also enjoy blending them into smoothies for a nutritional boost without altering the flavor much.
The best part? They’re packed with nutrients! I recommend experimenting with different varieties—each adds its own unique flavor.
Don’t be afraid to get creative in the kitchen; microgreens can elevate any dish, bringing freshness and vibrancy to my everyday meals.
Frequently Asked Questions
How Long Do Microgreens Take to Grow From Seed to Harvest?
Microgreens typically take about 7 to 21 days to grow from seed to harvest, depending on the variety.
I’ve found that most leafy greens like arugula and radish sprout quickly, often in just a week.
On the other hand, herbs like basil might take a bit longer.
I enjoy checking them daily to see how fast they grow, and it’s so rewarding to watch them thrive right before my eyes!
Can I Grow Microgreens Indoors Without Direct Sunlight?
Absolutely, you can grow microgreens indoors without direct sunlight!
I’ve done it using fluorescent or LED grow lights, which mimic natural light. Just make sure to place the lights about 2-4 inches above the plants and keep them on for 12-16 hours a day.
I’ve found that this setup works great, and my microgreens thrive beautifully.
Are There Any Pests That Commonly Affect Microgreens?
Absolutely, pests can affect microgreens, and I’ve encountered a few common ones.
Aphids and fungus gnats are frequent culprits. I’ve found that keeping my growing area clean and using a fine mist of water can deter these pests.
If things get serious, I might use an insecticidal soap. Regularly inspecting my microgreens helps me catch any issues early, ensuring I enjoy a healthy harvest.
Just stay vigilant, and you’ll be fine!
How Often Should I Check on My Microgreens?
I check on my microgreens daily, especially during their early growth stages.
It’s vital to monitor their moisture levels, light exposure, and any signs of pests or diseases. I usually spend a few minutes observing, ensuring they’re thriving.
Regular checks help me catch any issues before they escalate. Plus, I enjoy seeing the progress each day!
Trust me, a little attention goes a long way in growing healthy microgreens.
What Temperature Is Ideal for Growing Microgreens?
When I grow microgreens, I’ve found that the ideal temperature is between 65°F and 75°F.
This range helps ensure optimal germination and growth. If it’s too cold, the seeds might struggle, while too much heat can lead to rapid growth that affects flavor and texture.
I always keep an eye on the temperature, adjusting my space if needed to create the perfect environment for these little greens to thrive.
Conclusion
Starting your microgreens journey is both fun and rewarding. By following these simple steps, you’ll soon enjoy the fresh, vibrant flavors of your home-grown greens. Remember, each stage is an opportunity to learn and experiment, so don’t hesitate to try different seeds and methods. Whether you’re enhancing your meals or adding a pop of color to your dishes, your microgreens will surely impress. So, roll up your sleeves and dive into this green adventure—you won’t regret it!