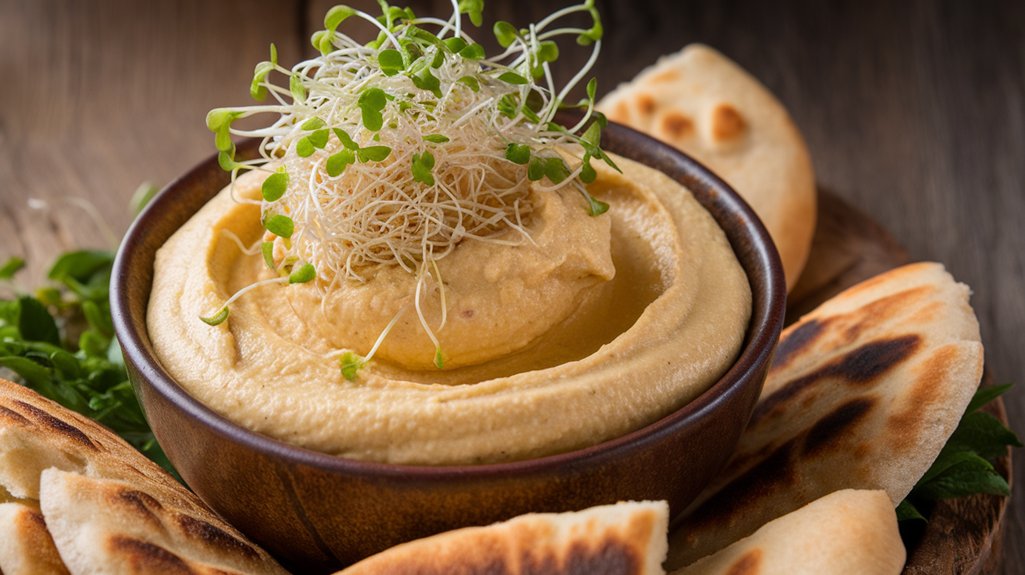
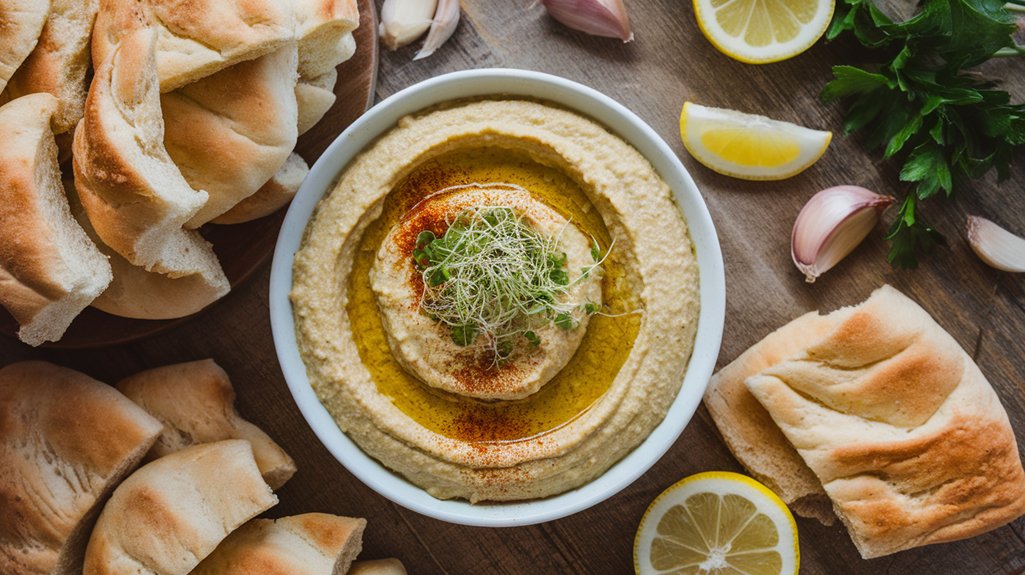
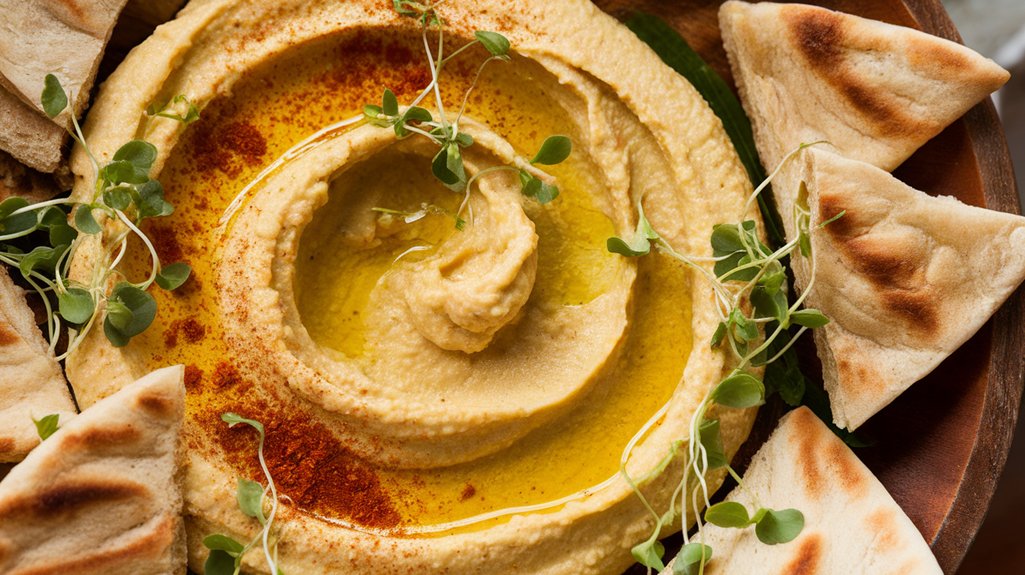
Chickpea Sprout Hummus With Pita Bread
I absolutely love pairing chickpea sprout hummus with warm pita bread! The creamy, nutty hummus, rich in protein and fiber, complements the soft, fluffy pita perfectly. I enjoy adding toppings like crumbled feta or a drizzle of balsamic glaze for a burst of flavor. Not only is this snack satisfying, but it’s also packed with nutrients. If you want to discover more tasty ideas and ways to enjoy this delicious combination, keep exploring!
Key Takeaways
- Chickpea sprout hummus pairs perfectly with pita bread, offering a nutritious and flavorful dip for snacking or entertaining.
- Top the hummus with crumbled feta or fresh herbs to enhance flavor and presentation when served with pita.
- The creamy texture of chickpea sprout hummus complements the soft, warm pita, making it a delightful combination.
- Drizzle balsamic glaze or add spices like smoked paprika for an extra flavor boost when enjoying with pita bread.
- Serve hummus with a side of fresh vegetables for a colorful and healthy platter alongside pita bread.
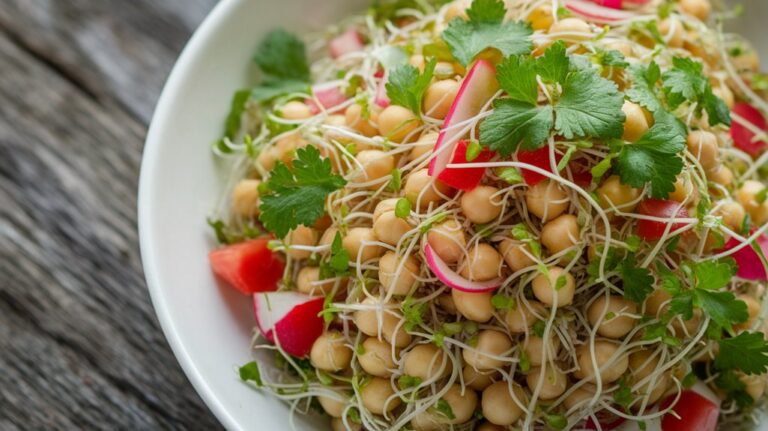
What Are Chickpea Sprouts?
When I first discovered chickpea sprouts, I was captivated by their unique texture and flavor. These tiny green gems are young shoots that emerge from soaked chickpeas, bursting with life and vitality.
Each sprout has a crisp crunch and a slightly nutty taste that adds a delightful twist to any dish. I love how easy they’re to grow at home—just soak chickpeas overnight, rinse them, and watch them sprout over a few days.
Not only do they elevate salads and wraps, but they also bring a fresh, vibrant dimension to hummus. Chickpea sprouts are versatile, making them a fun ingredient to experiment with in various recipes.
Trust me, once you try them, you’ll be hooked!
Health Benefits of Chickpea Sprout Hummus
Chickpea sprout hummus isn’t just a delicious dip; it’s a powerhouse of nutrition that can elevate your health in several ways.
When I indulge in this creamy delight, I know I’m fueling my body with essential nutrients.
- Rich in Protein: Chickpea sprouts provide a fantastic plant-based protein source, perfect for muscle repair and growth.
- High in Fiber: This hummus is packed with fiber, aiding digestion and keeping me full longer.
- Loaded with Vitamins: Chickpea sprouts are rich in vitamins A, C, and K, supporting my immune system and overall health.
Whether I’m snacking or entertaining, chickpea sprout hummus not only satisfies my taste buds but also nourishes my body, making it a staple in my kitchen.
Ingredients Needed for Chickpea Sprout Hummus
To whip up a delicious batch of chickpea sprout hummus, I gather a handful of key ingredients that come together to create a flavorful and nutritious dip. First, I start with fresh chickpea sprouts, which provide that delightful crunch and earthy flavor. Then, I add tahini for a creamy texture, along with lemon juice for a zesty kick. Garlic gives it a robust aroma, while olive oil adds richness. Lastly, I sprinkle in some salt and cumin for an extra layer of flavor. Here’s a quick overview of the ingredients:
| Ingredient | Quantity | Purpose |
|---|---|---|
| Chickpea Sprouts | 1 cup | Base of the hummus |
| Tahini | 2 tablespoons | Creaminess |
| Lemon Juice | 2 tablespoons | Zesty flavor |
| Garlic | 1 clove, minced | Aromatic depth |
Step-by-Step Guide to Sprouting Chickpeas
Sprouting chickpeas is a simple process that brings out their nutritional benefits and enhances their flavor.
I’ll walk you through the sprouting process step-by-step, sharing tips that have worked wonders for me.
Benefits of Sprouting Chickpeas
While exploring the world of nutritious ingredients, you’ll find that sprouting chickpeas offers an array of health benefits that can elevate your meals.
I’ve discovered that sprouting not only boosts their nutritional profile but also enhances their flavor and texture. Here are a few benefits I’ve personally experienced:
- Increased Nutrient Absorption: Sprouting chickpeas makes nutrients more bioavailable, allowing your body to absorb vitamins and minerals more effectively.
- Enhanced Digestibility: The sprouting process breaks down complex starches, making them easier to digest and reducing bloating.
- Rich in Antioxidants: Sprouted chickpeas are packed with antioxidants, which help combat oxidative stress and promote overall health.
Incorporating sprouted chickpeas into my diet has truly transformed my meals into nourishing experiences.
Sprouting Process Overview
Getting started with sprouting chickpeas is an exciting and rewarding endeavor that brings both nutrition and flavor to your kitchen.
First, I rinse about a cup of dried chickpeas under cool water, removing any debris. Next, I soak them in a bowl of water for 8 to 12 hours.
After soaking, I drain the water and place the chickpeas in a sprouting jar or a mesh-covered bowl. I keep them in a warm, dark spot, rinsing and draining them twice daily.
Within 2 to 3 days, I watch as tiny sprouts emerge, bringing life to my kitchen! Once they’re about an inch long, I know they’re ready to enjoy in my hummus or salads, packed with nutrients and flavor.
Tips for Successful Sprouting
To achieve successful sprouting, it’s essential to start with high-quality dried chickpeas. I always choose organic varieties, as they tend to sprout better and are free from harmful chemicals.
Here are a few tips I’ve found helpful:
- Rinse and soak: I rinse the chickpeas thoroughly and soak them in water for about 8-12 hours. This rehydrates them and kick-starts the sprouting process.
- Drain and rinse daily: After soaking, I drain the water and rinse the chickpeas at least once a day. This keeps them moist and prevents mold.
- Keep them in a cool, dark place: I store the sprouting chickpeas in a jar covered with a cloth, ensuring they get airflow while remaining in a suitable environment.
Following these steps, I’ve consistently enjoyed fresh, crunchy sprouts!
How to Make Chickpea Sprout Hummus
Crafting delicious Chickpea Sprout Hummus is an enjoyable culinary adventure that transforms simple ingredients into a creamy, nutritious dip.
First, I rinse my sprouted chickpeas and toss them into a food processor. I add tahini, fresh lemon juice, garlic, and a pinch of salt for flavor.
As I blend, I drizzle in olive oil, creating a silky texture. If the mixture feels too thick, I’ll add a splash of water to achieve the perfect consistency.
Once it’s smooth and creamy, I taste and adjust the seasoning as needed. Finally, I transfer the hummus to a bowl, drizzling a little olive oil on top for presentation.
It’s ready to enjoy with warm pita bread—simple yet utterly delightful!
Flavor Variations to Try
While chickpea sprout hummus is delicious on its own, experimenting with different flavors can elevate it to new heights.
I love to play around with various ingredients that not only enhance the taste but also add a twist to the classic recipe.
Here are some of my favorite flavor variations to try:
- Roasted Garlic: Adding roasted garlic gives the hummus a rich, nutty flavor that’s irresistible.
- Spicy Harissa: A spoonful of harissa introduces a delightful kick, perfect for those who enjoy a bit of heat.
- Zesty Lemon-Basil: Fresh basil and a splash of lemon juice create a refreshing, vibrant taste that’s perfect for summer.
Give these variations a go, and you might just discover a new favorite!
Serving Suggestions for Pita Bread
When it comes to enjoying chickpea sprout hummus with pita bread, the possibilities are endless!
I love experimenting with various dipping options and flavorful toppings that elevate the experience.
Let’s explore some creative serving ideas that will make your snack time truly delightful!
Dipping Options and Pairings
If you’re looking for the perfect companions for your chickpea sprout hummus and pita bread, you’ve got plenty of delicious options to explore. Dipping and pairing can elevate your experience, making it even more enjoyable.
Here are a few of my favorites:
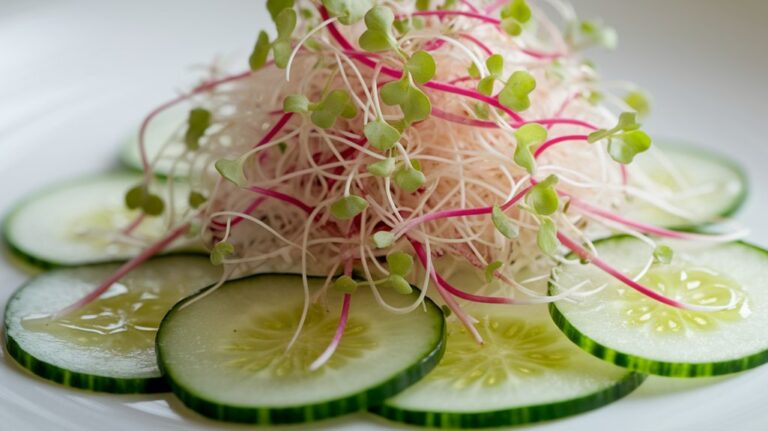
- Fresh Veggies: Crisp cucumber slices or colorful bell pepper strips add a refreshing crunch that complements the creamy hummus beautifully.
- Olives: A mix of salty Kalamata and green olives brings a briny contrast, enhancing the overall flavor profile.
- Pickled Radishes: Their tangy bite offers a delightful sharpness, cutting through the richness of the hummus.
Experimenting with these options not only adds variety to your snack but also makes it a fun culinary adventure!
Flavorful Toppings to Try
After enjoying the delightful combination of chickpea sprout hummus and fresh veggies, it’s time to elevate your pita bread experience with some flavorful toppings.
I love to sprinkle crumbled feta or creamy goat cheese on top for a tangy contrast. A drizzle of balsamic glaze adds a lovely sweetness that pairs perfectly with the hummus.
For a spicy kick, try diced jalapeños or a sprinkle of smoked paprika. Fresh herbs like cilantro or parsley bring brightness and freshness, while roasted nuts add a satisfying crunch.
And don’t forget about sun-dried tomatoes or olives for a savory touch. Each topping enhances the flavor profile, making your pita bread not just a vessel, but a delightful culinary adventure!
Creative Serving Ideas
How can you turn a simple meal into an unforgettable experience? By getting creative with how you serve your chickpea sprout hummus and pita bread!
Here are some ideas that’ll elevate your dining experience:
- Hummus Platter: Arrange a variety of vibrant vegetables, olives, and nuts around a bowl of hummus for a colorful, shareable feast.
- Pita Chips: Bake pita bread until crispy, then serve it alongside your hummus for a crunchy twist.
- Stuffed Pitas: Spread hummus inside warm pita pockets and fill them with grilled veggies, feta, or even sliced meats for a hearty meal.
Each of these serving suggestions not only enhances flavor but also makes your meal visually appealing, turning an everyday dish into something special.
Enjoy!
Nutritional Information
Chickpea sprout hummus packs a nutritional punch that’s hard to ignore. It’s loaded with plant-based protein, making it an excellent choice for anyone looking to boost their protein intake without meat.
The sprouted chickpeas enhance nutrient absorption and provide essential vitamins like B6 and folate. Plus, you’ll find healthy fats from tahini, which supports heart health. Each serving delivers fiber, too, promoting digestive health and keeping you full longer.
The antioxidants in garlic and lemon juice add extra benefits, helping to fight inflammation. As you enjoy this creamy dip with pita bread, you’re not just indulging your taste buds; you’re nourishing your body with wholesome goodness.
It’s a guilt-free delight that’s as healthy as it’s delicious!
Tips for Storing Hummus
When it comes to storing hummus, I’ve found that using airtight containers is key to preserving its fresh flavor and texture.
It’s crucial to keep it at the right refrigeration temperature, as this helps maintain its quality longer.
For those days when I whip up a big batch, I love knowing that freezing is an option for even longer storage.
Airtight Containers Recommended
Storing your hummus properly can make all the difference in maintaining its fresh taste and creamy texture. One of the best ways I’ve found to keep my hummus delicious is by using airtight containers.
These magical little vessels prevent air from spoiling that lovely dip. Here are a few tips I recommend:
- Choose glass containers: They’re non-reactive and won’t absorb flavors.
- Opt for smaller sizes: This way, you can minimize air exposure each time you dig in.
- Seal tightly: Always ensure the lid is secure to keep out unwanted moisture and odors.
Refrigeration Temperature Importance
Maintaining the right refrigeration temperature is crucial for keeping hummus fresh and safe to eat. I recommend setting your fridge between 34°F and 40°F (1°C to 4°C). This range slows bacterial growth and preserves flavor.
Here’s a quick reference table for you:
| Temperature (°F) | Effect on Hummus | Recommended Action |
|---|---|---|
| Below 34°F | Freezing possible | Use immediately or freeze |
| 34°F – 40°F | Optimal freshness | Store for up to a week |
| Above 40°F | Bacterial growth | Discard after 2 hours |
Freezing for Longer Storage
If you’re looking to extend the life of your hummus, freezing is a fantastic option. I love knowing that I can enjoy my chickpea sprout hummus even weeks later.
Here are a few tips I’ve found helpful when freezing hummus:
- Use airtight containers: I prefer glass containers or heavy-duty freezer bags to prevent freezer burn.
- Leave space for expansion: Hummus expands when it freezes, so I make sure to leave some room at the top.
- Label and date: I always label my containers with the date and contents, ensuring I know exactly what I’m grabbing later.
When you’re ready to enjoy it again, just thaw it in the fridge overnight, and give it a good stir to revive its creamy texture.
Creative Ways to Use Leftover Hummus
While leftover hummus often sits forlornly in the fridge, it’s actually a treasure trove of culinary potential waiting to be unleashed. I’ve discovered some creative ways to use it that transform it into delightful meals and snacks. For instance, I love spreading it on sandwiches or using it as a salad dressing base. It also makes a fantastic dip for veggies or a spread in wraps. If I’m feeling adventurous, I even mix it into pasta for a creamy sauce.
Here’s a quick reference table for inspiration:
| Use Case | Description | Pairing |
|---|---|---|
| Sandwich Spread | Adds creaminess and flavor | Fresh vegetables |
| Salad Dressing Base | Mix with olive oil and vinegar | Leafy greens |
| Veggie Dip | Perfect for snacking | Carrot and celery sticks |
| Pasta Sauce | Blend with pasta for a unique twist | Any noodle type |
Frequently Asked Questions
Can I Use Canned Chickpeas Instead of Sprouted Ones?
Absolutely, you can use canned chickpeas instead of sprouted ones! I’ve done it myself when I needed a quick fix.
Canned chickpeas are convenient and still packed with flavor and nutrients. Just rinse them well to remove any excess sodium.
While sprouted chickpeas offer a unique texture and taste, canned ones will give you a creamy consistency that’s perfect for dips or spreads.
Give it a try; you’ll love the results!
How Long Does It Take to Sprout Chickpeas?
When I sprout chickpeas, it usually takes about 24 to 48 hours.
I start by soaking them overnight, then drain and rinse them.
After that, I place them in a jar or sprouting tray, keeping them moist but not soaking wet.
I rinse them a couple of times a day, watching those little gems grow!
The result is fresh, nutty sprouts that add a delightful crunch and nutrition to any dish.
Is Chickpea Sprout Hummus Suitable for Vegans?
Absolutely, chickpea sprout hummus is perfect for vegans! It’s made from sprouted chickpeas, tahini, olive oil, lemon juice, and garlic—ingredients that not only pack a flavor punch but also align with a vegan lifestyle.
I love how creamy and nutritious it is, making it a fantastic option for anyone avoiding animal products. Plus, it’s a great source of protein and fiber, so you get a delicious and healthy snack all in one!
What Is the Best Way to Store Pita Bread?
When I want to store pita bread, I wrap it in plastic wrap or place it in a resealable bag to keep it fresh.
I always make sure to squeeze out any air to prevent it from drying out.
If I’ve got extra, I pop it in the freezer, where it lasts for months.
When I’m ready to eat it, I just thaw it at room temperature or warm it in the oven.
Can I Freeze Chickpea Sprout Hummus?
Absolutely, you can freeze chickpea sprout hummus!
I’ve done it myself, and it’s a great way to preserve that creamy goodness. Just scoop it into an airtight container, leaving some space at the top for expansion.
I usually label it with the date, so I don’t forget. When I’m ready to enjoy it, I let it thaw in the fridge overnight.
It tastes just as delicious, making it a perfect meal prep option!
Conclusion
In conclusion, chickpea sprout hummus paired with warm pita bread is not just a delicious treat; it’s a powerhouse of nutrition. With a few simple steps, you can enjoy the vibrant flavors and health benefits of sprouted chickpeas. Whether you’re enjoying it as a snack or a meal, this hummus is versatile and satisfying. So go ahead, give it a try, and let your taste buds revel in this delightful, wholesome experience!