How to Harvest and Store Microgreens for Maximum Freshness
To harvest microgreens for maximum freshness, I wait until they reach 1 to 3 inches and have vibrant cotyledons. Using sharp scissors, I cut just above the soil line to reduce damage. After harvesting, I store them in breathable containers at temperatures between 34°F and 40°F. I avoid airtight options to prevent moisture buildup, which can cause spoilage. By following these guidelines, I keep my microgreens fresh longer, and there’s even more to discover about enhancing their use.
Key Takeaways
- Harvest microgreens when they reach 1 to 3 inches tall and display vibrant cotyledons for optimal freshness.
- Use sharp scissors or a knife to cut just above the soil line, minimizing plant damage during harvesting.
- Store harvested microgreens in breathable containers at temperatures between 34°F and 40°F to maintain moisture and prevent spoilage.
- Avoid airtight containers and keep microgreens away from ethylene-producing fruits to enhance their shelf life.
- Label containers with the harvest date and use a paper towel inside to absorb excess moisture for better storage.
Understanding Microgreens: What They Are and Why They Matter

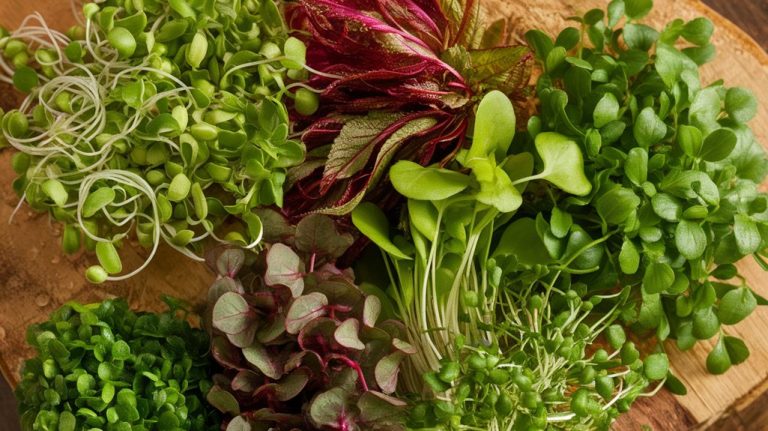
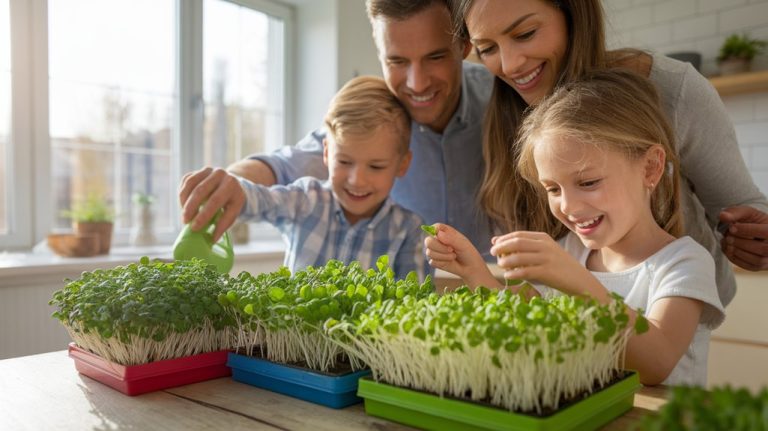
Microgreens, those vibrant young plants that pack a nutritional punch, have gained popularity for good reason. They’re not just trendy; they’re nutrient-dense powerhouses.
Typically harvested within 7 to 21 days after germination, these tiny greens come from various edible plants, including herbs and vegetables. Their flavor profiles range from mild to spicy, offering versatility in culinary applications.
I find they’re rich in vitamins, minerals, and antioxidants, often containing higher concentrations than their mature counterparts. This makes them an excellent choice for health-conscious individuals.
Additionally, they’re easy to grow, requiring minimal space and equipment, making them accessible to everyone.
Understanding microgreens‘ benefits can enhance your diet and elevate your meals, making them a worthwhile addition to any kitchen.
When to Harvest Your Microgreens
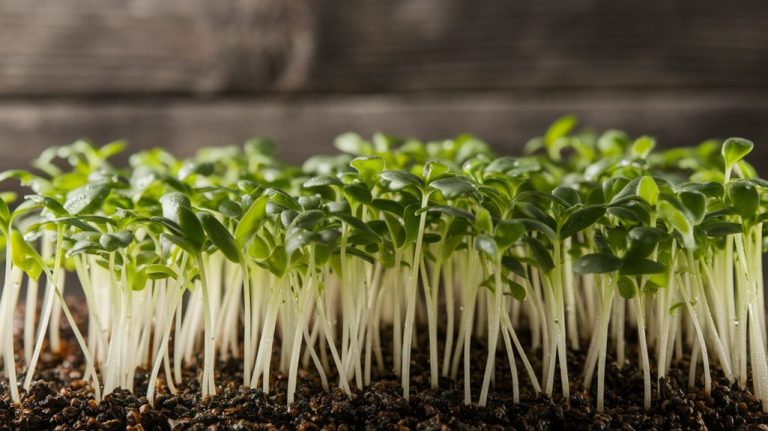
When should you consider harvesting your microgreens? I usually wait until they’re about 1 to 3 inches tall, depending on the variety. Generally, this is around 7 to 21 days after germination.
At this stage, the cotyledons—the first leaves—are fully developed, showcasing their vibrant colors and flavors. I look for signs of maturity, such as sturdy stems and well-formed leaves; this is when the microgreens are most nutrient-dense.
Additionally, I pay attention to the taste—if they start to develop a bitter flavor, it’s a sign to harvest soon. Timing is crucial; if you wait too long, they may become leggy or lose their crispness.
Harvesting at the right time ensures maximum freshness and flavor.
Tools Needed for Harvesting Microgreens
To successfully harvest microgreens, I’ve found that having the right tools on hand makes a significant difference.
First, a pair of sharp scissors or a knife is essential for clean cuts, ensuring minimal damage to the roots. I also recommend using a small container or basket to collect the harvested greens, which helps prevent bruising.
A pair of gloves can be useful too, keeping my hands clean and protecting the greens from contaminants.
Lastly, a clean surface for processing the microgreens post-harvest is crucial. This setup not only streamlines the process but also maintains the quality of the greens.
With these tools, I can efficiently harvest my microgreens, ensuring they stay fresh and vibrant for storage.
Step-by-Step Guide to Harvesting Microgreens
When it comes to harvesting microgreens, timing and technique are crucial for optimal flavor and freshness.
I’ll walk you through the ideal harvesting time, the proper cutting techniques to use, and essential post-harvest handling tips.
Understanding these steps ensures you get the best out of your microgreens every time.
Ideal Harvesting Time
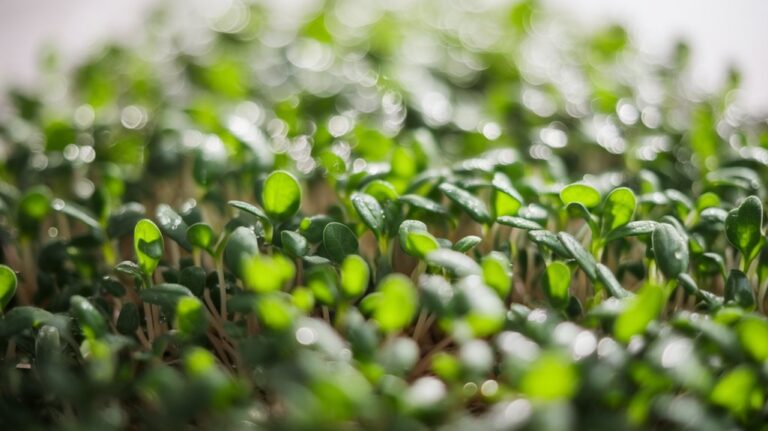
As I observe my microgreens, I can tell that timing is crucial for achieving the best flavor and texture. Typically, I find that the ideal harvesting time is when the first true leaves, known as cotyledons, have emerged. This usually occurs about 7 to 21 days after germination, depending on the variety.
I pay close attention to the color and height; vibrant greens that stand around 1 to 3 inches tall signal readiness. If I wait too long, the greens can become bitter or leggy.
I also consider the intended use; for salads, I prefer them slightly younger, while for garnishes, I might let them grow a bit longer. Consistently checking my microgreens helps me ensure peak freshness.
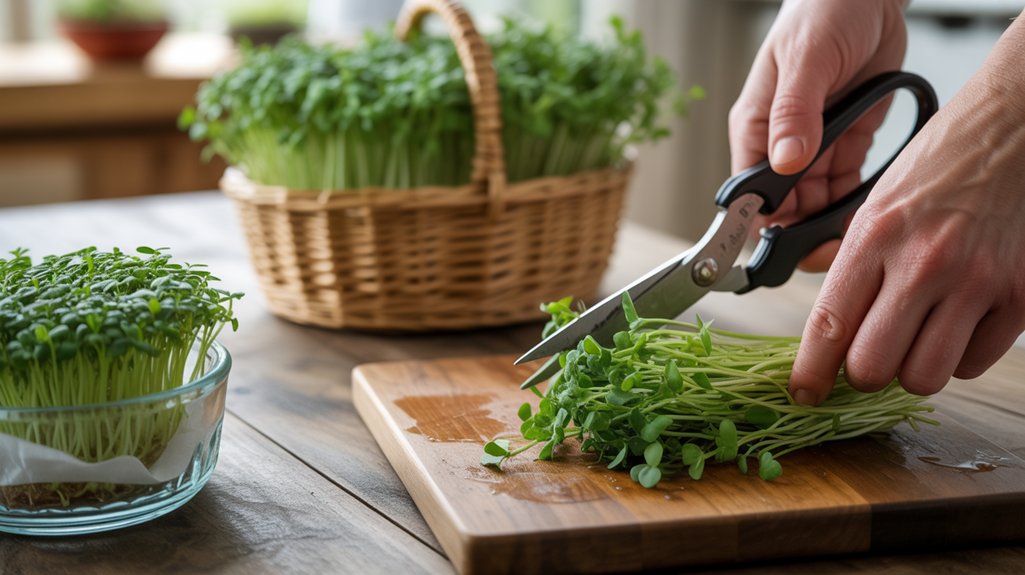
Proper Cutting Techniques
Having identified the right time to harvest my microgreens, the next step involves using proper cutting techniques to preserve their quality and flavor.
I always use a sharp, clean pair of scissors or a knife to ensure a precise cut. It’s crucial to cut just above the soil line, which minimizes damage to the plant and encourages regrowth if I decide to harvest again.
I take my time to avoid crushing the delicate stems, maintaining their crispness. Additionally, I prefer to cut in small batches to prevent excess exposure to air, which can lead to wilting.
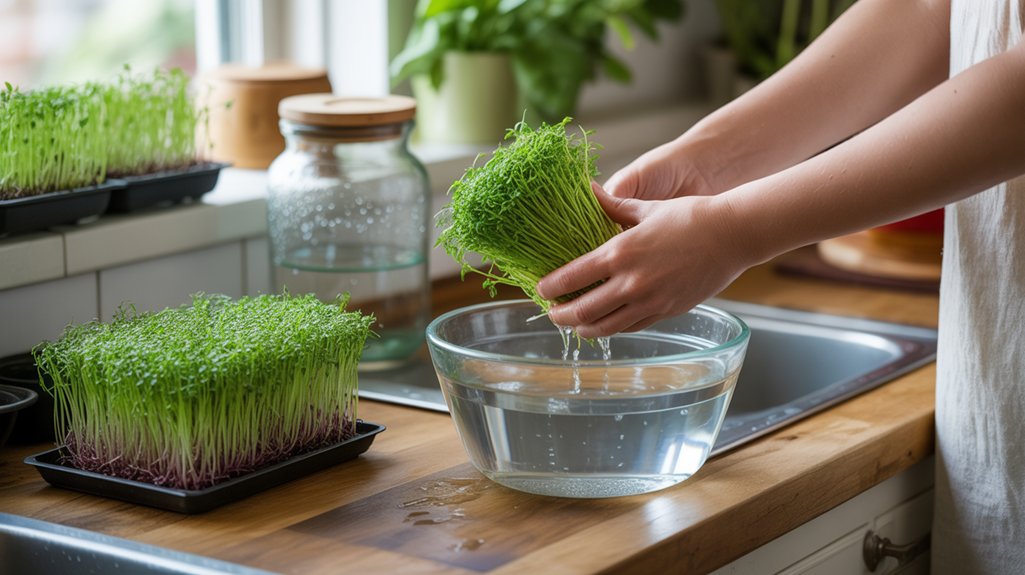
Post-Harvest Handling Tips
After I’ve harvested my microgreens, it’s essential to handle them properly to ensure they stay fresh and flavorful.
First, I gently rinse them under cool, running water to remove any soil or debris. After rinsing, I place them on a clean kitchen towel to absorb excess moisture—this step’s crucial since excess water can lead to spoilage.
Next, I carefully transfer the microgreens into breathable containers, avoiding overcrowding to allow for air circulation. I then store them in the refrigerator, ideally in the crisper drawer, which maintains humidity levels.
Lastly, I try to consume them within a week for the best taste and nutritional value. Following these steps helps keep my microgreens vibrant and delicious.
How to Clean and Prepare Microgreens After Harvesting
Once you’ve harvested your microgreens, cleaning and preparing them properly is crucial to ensure their flavor and freshness. I start by rinsing them gently under cool, running water to remove any dirt or debris. After that, I lay them out on a clean kitchen towel to dry. Here’s a simple table outlining the steps:
| Step | Description |
|---|---|
| Rinse | Gently wash under cool water |
| Drain | Allow excess water to drip off |
| Dry | Place on a clean towel for drying |
| Inspect | Check for any damaged leaves |
Best Practices for Storing Microgreens
When storing microgreens, I’ve found that maintaining the ideal temperature is crucial for preserving their freshness.
Proper packaging techniques can also make a significant difference in extending their shelf life.
Ideal Temperature Conditions
While I understand that microgreens are delicate, storing them under ideal temperature conditions is crucial for preserving their freshness and nutritional value.
I’ve found that keeping microgreens at a temperature between 34°F and 40°F (1°C to 4°C) is optimal. This range slows down decay and maintains their vibrant color and crisp texture.
If temperatures rise above 40°F, I notice a significant drop in quality, as wilting and loss of nutrients occur rapidly.
It’s essential to monitor the temperature regularly, especially if you’re using a refrigerator that may have fluctuating conditions.
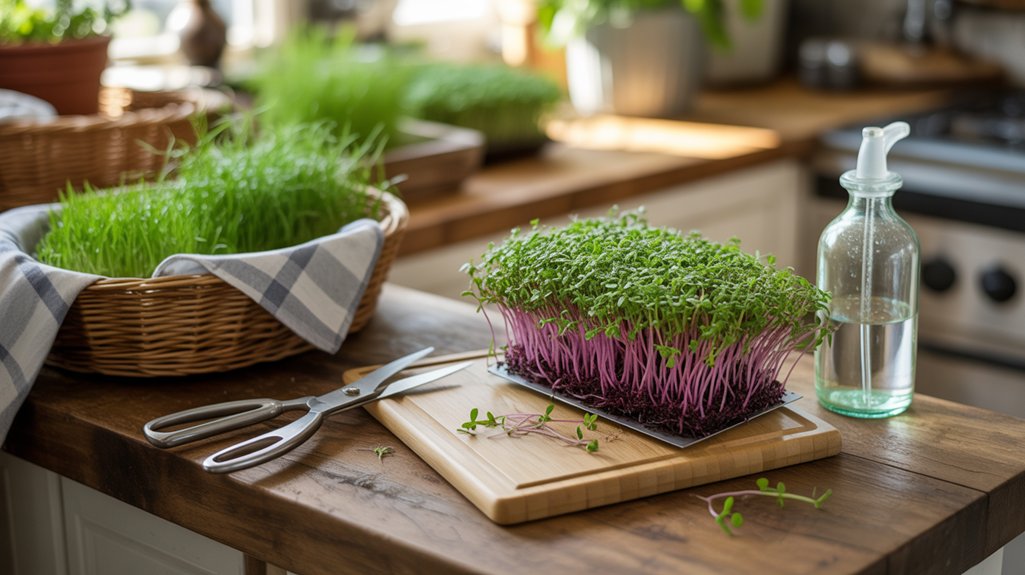
Proper Packaging Techniques
Effective packaging plays a vital role in preserving the quality of microgreens. I’ve found that using breathable containers helps maintain moisture without causing mold. It’s essential to choose the right materials for optimal freshness.
Here’s a quick overview of packaging options:
| Packaging Type | Benefits |
|---|---|
| Clamshell Containers | Protects from crushing, allows airflow |
| Paper Bags | Eco-friendly, absorbs moisture |
| Plastic Wrap | Seals in freshness, customizable |
When I package my microgreens, I always label them with the harvest date. This not only helps me track freshness but also reminds me to use them promptly. Remember, proper packaging can significantly enhance the shelf life of your microgreens!
Optimal Storage Conditions for Freshness
To maintain the freshness of microgreens, I recommend storing them under specific conditions that minimize moisture loss and prevent spoilage.
First, keep them in a cool environment, ideally between 32°F and 40°F (0°C to 4°C). A refrigerator is perfect for this purpose.
Second, use breathable containers, such as perforated plastic bags or containers lined with paper towels, to absorb excess moisture while allowing airflow. Avoid airtight containers, as they can trap humidity and promote mold growth.
Additionally, store microgreens away from ethylene-producing fruits, like apples and bananas, which can accelerate spoilage.
Tips for Using Microgreens in Your Cooking
Microgreens are a versatile ingredient that can elevate a variety of dishes with their vibrant flavors and textures. I love incorporating them into salads for a fresh crunch, or as a garnish on soups to add color and depth.
They work beautifully in sandwiches, providing a peppery kick that enhances the overall taste. When cooking, I often sprinkle microgreens over omelets or pasta dishes just before serving, preserving their crispiness and visual appeal.
It’s essential to avoid cooking them for too long, as heat can diminish their flavor and nutrients. Experimenting with different varieties, like arugula or basil, can also bring unique tastes to your meals, making microgreens an indispensable addition to my culinary repertoire.
Frequently Asked Questions
Can I Harvest Microgreens Multiple Times From the Same Plant?
I’ve found that most microgreens are typically harvested just once.
Once you cut them, they don’t regrow like traditional vegetables. However, some varieties, like certain herbs, might produce new growth if you leave a bit of the stem and leaves.
Still, I recommend starting a new batch for the best flavor and nutrition. It keeps my microgreens fresh and vibrant, ensuring I always have a tasty supply on hand.
What Are the Best Microgreens for Beginners to Grow?
For beginners, I recommend starting with radish, lettuce, and basil microgreens. They’re easy to grow and germinate quickly, which keeps motivation high.
Radish offers a spicy flavor, while lettuce provides a mild taste, and basil adds a lovely aroma. I’ve found that these varieties thrive indoors or outdoors, making them versatile.
Plus, they require minimal care, so you won’t feel overwhelmed. These microgreens can boost your culinary creations effortlessly!
How Long Do Microgreens Typically Last After Harvesting?
Microgreens typically last about 5 to 14 days after harvesting, depending on the variety and how you store them.
I’ve found that keeping them in a cool, dark place helps extend their freshness. If I place them in a sealed container with a damp paper towel, they stay crisp longer.
It’s crucial to check for any signs of wilting or spoilage during that time to enjoy their full flavor and nutritional benefits.
Can I Freeze Microgreens for Later Use?
Yes, you can freeze microgreens for later use, but I recommend doing it with care.
First, wash and dry them thoroughly to prevent ice crystals from forming. Then, spread them in a single layer on a baking sheet and freeze until solid.
Once frozen, transfer them to airtight containers or freezer bags. This method helps maintain their flavor and nutrients, making them a great addition to smoothies or cooked dishes later on!
What Pests Should I Watch Out for When Growing Microgreens?
When growing microgreens, I keep an eye out for pests like aphids, fungus gnats, and spider mites.
Aphids can suck the sap from young plants, while fungus gnats thrive in damp conditions, damaging roots.
Spider mites create fine webs and cause leaf discoloration.
To combat these pests, I maintain proper airflow and humidity, and I sometimes use insecticidal soap or neem oil as a preventive measure.
Staying vigilant helps me protect my crop’s health.
Conclusion
In conclusion, harvesting and storing microgreens properly is essential for preserving their freshness and nutritional value. By timing your harvest right and using the right tools, you can ensure peak flavor and texture. After cleaning and preparing them, store your microgreens in optimal conditions to maintain their vitality. Remember, these tiny greens can elevate your dishes, so leveraging them effectively in your cooking can enhance both taste and presentation. Enjoy the vibrant benefits microgreens bring to your meals!