Sprouting 101: A Beginner’s Guide to Perfect Sprouts Every Time
I’ve found that sprouting seeds at home is a simple and rewarding process. Sprouts are packed with essential nutrients like vitamins A, C, and K, making them a healthy addition to any meal. To get started, choose high-quality seeds, gather some basic supplies, and create the right environment for your sprouts. Avoid common mistakes that can lead to disappointment, and soon you’ll be enjoying fresh, crunchy sprouts. Stick around to discover more tips and creative uses for your delicious sprouts!
Key Takeaways
- Choose high-quality, preferably organic seeds for optimal germination and nutrient content in your sprouts.
- Use a sprouting jar or dedicated sprouter to ensure proper airflow and drainage during growth.
- Rinse seeds thoroughly and maintain consistent temperature and humidity for successful sprout development.
- Store harvested sprouts in the refrigerator’s crisper drawer, ensuring good airflow and preventing overcrowding.
- Experiment with different types of seeds to discover your favorite flavors and textures in various dishes.
Understanding the Benefits of Sprouting

When I first discovered sprouting, I was amazed by the numerous benefits it offers.
Sprouts are packed with essential nutrients, including vitamins A, C, E, and K, as well as minerals like calcium and iron. They’re also rich in enzymes that aid digestion, making them easier to absorb.
Research shows that sprouting can increase the bioavailability of nutrients, meaning our bodies can utilize them more effectively. Additionally, sprouts are low in calories, making them a great choice for anyone looking to maintain or lose weight.
They also provide a satisfying crunch and enhance the flavor of meals. Incorporating sprouts into my diet hasn’t only boosted my nutrient intake but also added variety to my meals.
Choosing the Right Seeds for Sprouting
When I choose seeds for sprouting, I consider the different types available and whether I prefer organic or conventional options.
It’s essential to source seeds from reputable suppliers to ensure quality and safety.
Let’s explore these factors to help you make informed decisions for your sprouting journey.
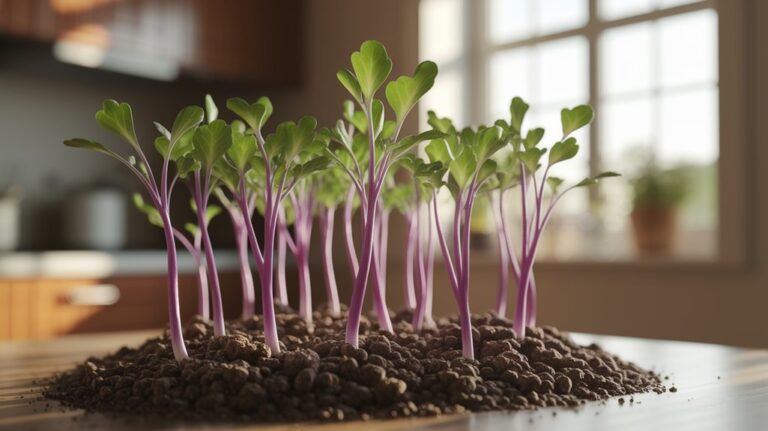
Types of Sprouting Seeds
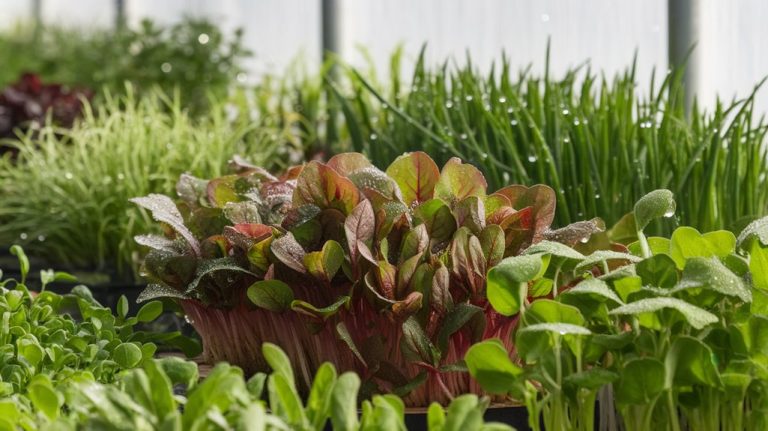
Choosing the right seeds for sprouting is essential for a successful and nutritious harvest. There are several types of seeds I love to sprout.
Alfalfa seeds are a popular choice due to their mild flavor and crunchy texture, perfect for salads and sandwiches.
Broccoli seeds pack a nutritional punch, rich in vitamins and antioxidants.
Mung beans are great for stir-fries and have a delightful crunch.
If you’re looking for something unique, try radish seeds for a spicy kick.
Lentils are also fantastic, offering a hearty addition to various dishes.
Each type of seed has its unique taste and health benefits, so I encourage you to experiment and find your favorites!
Organic vs. Conventional Seeds
While both organic and conventional seeds can be used for sprouting, my preference leans towards organic options due to their cultivation methods.
Organic seeds are grown without synthetic pesticides or fertilizers, which means I’m avoiding harmful chemicals that could affect my health. They also promote biodiversity and support sustainable farming practices, which I find really important.
Studies suggest that organic seeds may have higher nutrient levels, too, making my sprouts not just safer but potentially more nutritious.
It’s also reassuring to know that organic seeds often come from non-GMO sources, ensuring I’m consuming natural varieties.
Ultimately, choosing organic seeds aligns with my values of health and environmental stewardship, giving me peace of mind as I grow my delicious sprouts.
Seed Sourcing Tips
How can I ensure I’m selecting the best seeds for sprouting? First, I always choose seeds specifically labeled for sprouting, as these are tested for germination and safety.
I prefer organic seeds, since they’re free from harmful pesticides and chemicals, promoting healthier sprouts. It’s crucial to buy from reputable sources, like certified organic suppliers or local health food stores, to guarantee quality.
Additionally, I check for freshness by looking at the packaging date—older seeds may have lower germination rates. I also consider the type of sprout I want; for example, alfalfa or broccoli sprouts are popular and easy to grow.
Essential Supplies for Successful Sprouting
To successfully grow your own sprouts, gathering the right supplies is essential. First, you’ll need high-quality seeds, preferably organic, to ensure optimal germination and flavor.
Next, invest in a sprouting jar or a dedicated sprouter; these provide adequate airflow and drainage, which are crucial for healthy growth. A fine mesh lid is also important to prevent seeds from escaping while allowing water to flow freely.
You’ll want distilled water for rinsing and soaking your seeds, as it’s free from chlorine and impurities. Lastly, a warm, dark place is ideal for the initial sprouting phase.
With these supplies in hand, you’re well on your way to producing delicious, nutritious sprouts right at home!
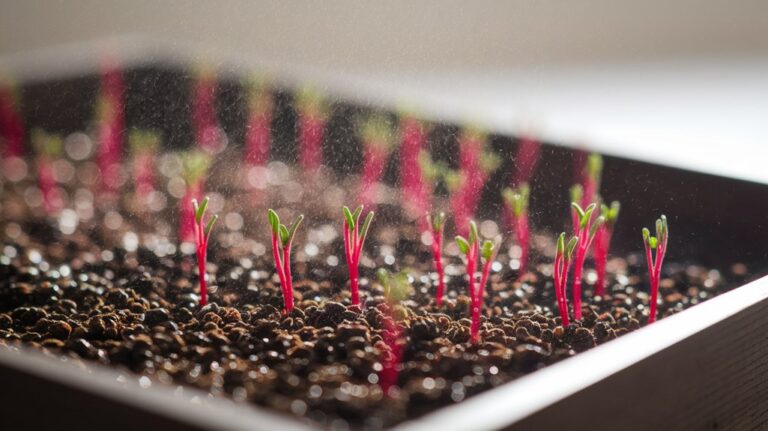
Step-by-Step Guide to Sprouting Seeds
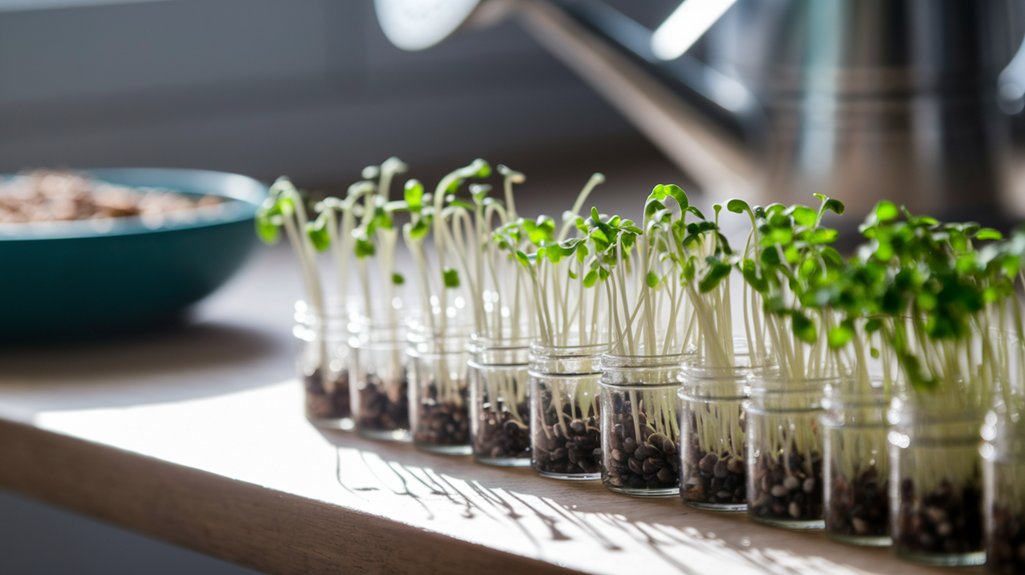
Sprouting seeds is a straightforward process that can yield nutritious results in just a few days.
First, I gather my seeds and rinse them thoroughly under cool water to remove any debris. Next, I place the seeds in a jar or sprouting tray and cover them with water, letting them soak for about 8 hours.
After soaking, I drain the water and rinse the seeds again. I then place the jar at an angle to facilitate drainage and airflow.
For the next few days, I rinse and drain the seeds twice daily. I keep an eye on them, ensuring they stay moist but not soggy.
In about 3 to 7 days, I’ll have fresh, crunchy sprouts ready to enjoy!
Creating the Ideal Environment for Sprouts
After getting the hang of the sprouting process, creating the ideal environment for your seeds can significantly enhance their growth.
First, I ensure my seeds have plenty of moisture without being waterlogged. A spray bottle works wonders for keeping them damp.
Next, I focus on temperature; most seeds thrive in a warm spot, ideally around 70-75°F (21-24°C).
Light is another critical factor; once the seeds sprout, I place them in indirect sunlight to avoid scorching.
Lastly, good air circulation prevents mold growth, so I avoid overcrowding my jars.
By maintaining these conditions, I’ve seen healthier, faster-growing sprouts that are ready to enjoy in my meals.
Common Mistakes to Avoid When Sprouting
While sprouting can be a rewarding experience, there are several common mistakes that can hinder your success. I’ve learned a few lessons along the way, and I want to share them with you.
| Mistake | Description |
|---|---|
| Overcrowding Seeds | Too many seeds can lead to poor air circulation. |
| Inadequate Rinsing | Failing to rinse can cause mold growth. |
| Using Old Seeds | Old seeds may have lower germination rates. |
| Improper Drainage | Waterlogged seeds can rot. |
| Ignoring Temperature | Sprouts need a consistent, warm environment. |
Harvesting and Storing Your Sprouts
When it comes to harvesting my sprouts, I’ve learned that timing and technique matter for the best flavor and nutrition.
I’ll share the optimal storage conditions to keep them fresh and some tips to maximize their shelf life.
Let’s make sure your hard work pays off by properly enjoying your sprouts!
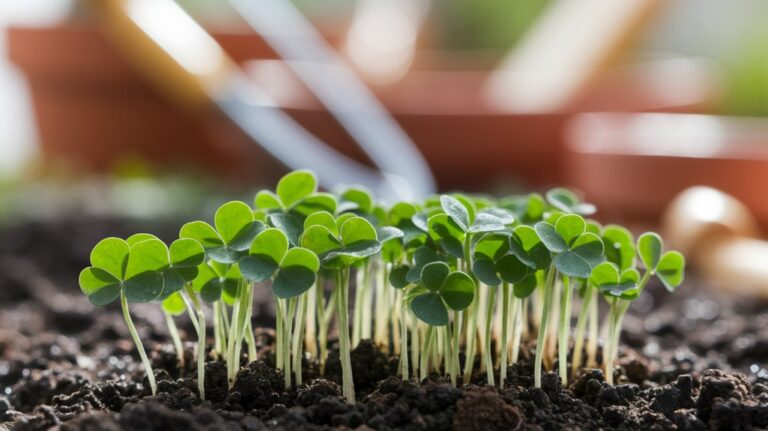
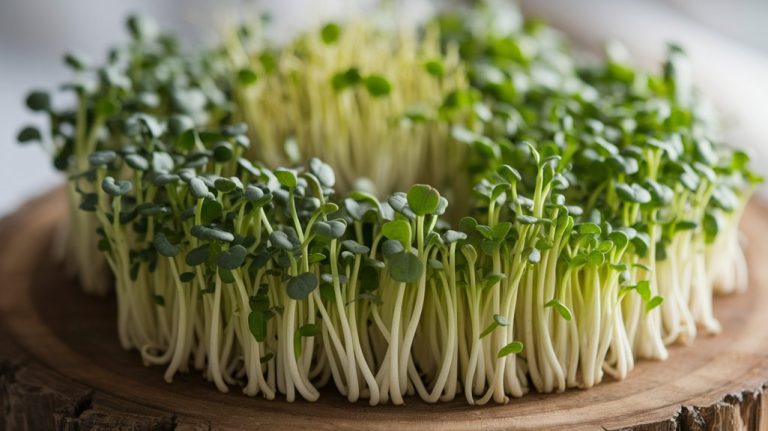
Best Harvesting Techniques
Harvesting your sprouts at the right time is crucial for maximizing their flavor and nutritional benefits. I usually wait until the sprouts are about 1 to 2 inches long, which is when they’re at their peak taste and nutrition.
To harvest, I gently rinse the sprouts under cold water to remove any debris, then use clean scissors to snip them at the base. This method minimizes damage and keeps them fresh longer. I avoid pulling them out by hand, as that can disturb the remaining sprouts.
Once harvested, I place them in a clean container, ready for use. Remember, timing is everything, so keep an eye on them to ensure you’re enjoying the best of your homegrown sprouts!
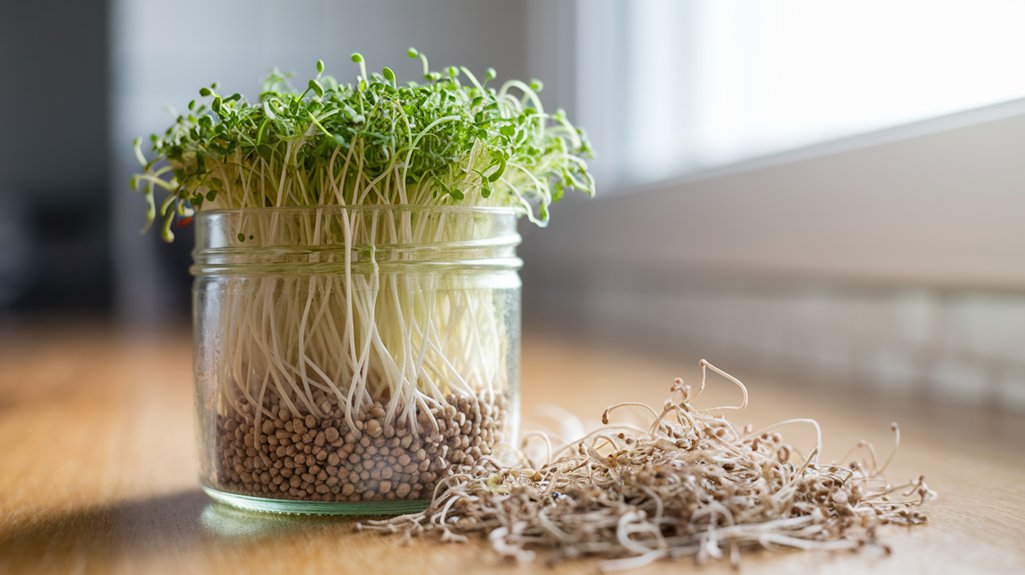
Optimal Storage Conditions
After you’ve harvested your sprouts, proper storage is key to maintaining their freshness and nutritional value.
I typically rinse my sprouts gently under cold water and then pat them dry with a clean towel.
Next, I place them in an airtight container lined with a paper towel to absorb excess moisture.
It’s crucial to keep them in the refrigerator, ideally in the crisper drawer, where humidity is regulated.
I also avoid overcrowding the container, as good airflow helps prevent spoilage.
Sprouts thrive in cooler temperatures, so keeping them between 32°F and 40°F works best.
Shelf Life Tips
To ensure your sprouts remain fresh and safe to eat, it’s essential to understand their shelf life and the best practices for storage. I’ve found that properly harvested and stored sprouts can last up to a week in the refrigerator. Always rinse your sprouts before storing them in a breathable container.
Here’s a quick reference table to guide you:
| Sprout Type | Shelf Life (Refrigerated) | Best Storage Method |
|---|---|---|
| Alfalfa | 5-7 days | Paper towel-lined container |
| Mung Bean | 5-7 days | Ventilated container |
| Broccoli | 5-10 days | Airtight container |
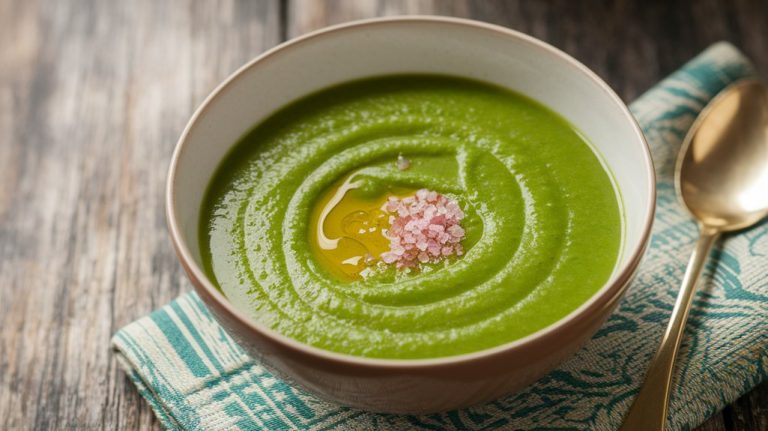
Creative Ways to Use Sprouts in Your Meals
When I think about elevating my meals, sprouts often come to mind as a versatile ingredient that packs a nutritional punch. They’re not just for salads; I love incorporating them in various dishes.
Here are some creative ways to use sprouts in your meals:
- Sandwiches and Wraps: Add a handful of sprouts for crunch and nutrition.
- Stir-Fries: Toss them in during the last few minutes of cooking for a fresh texture.
- Smoothies: Blend sprouts into your morning smoothie for an extra boost of vitamins.
- Soups: Use sprouts as a garnish for a pop of color and added nutrients.
These simple additions can transform ordinary dishes into something special while enhancing their health benefits.
Frequently Asked Questions
How Long Do Different Types of Seeds Take to Sprout?
When it comes to sprouting seeds, the time it takes can vary quite a bit.
For instance, alfalfa sprouts typically take about 4 to 6 days, while mung beans can sprout in just 2 to 4 days.
On the other hand, lentils usually require around 3 to 5 days.
I’ve found that keeping the seeds moist and in a warm environment really helps speed up the process.
It’s fascinating to watch them grow!
Can I Sprout Seeds Without Soil?
Absolutely, you can sprout seeds without soil! I’ve done it using just water and a jar.
I soak the seeds overnight, then rinse and drain them every day. Within a few days, I see tiny sprouts emerging!
This method works well for various seeds like alfalfa and mung beans. It’s a simple and clean way to grow fresh sprouts right in my kitchen, and I love the results!
Is It Safe to Sprout Seeds at Home?
Absolutely, it’s safe to sprout seeds at home as long as you take proper precautions.
I always use clean jars, fresh seeds, and filtered water to minimize any contamination risks. Keeping everything sanitized helps prevent harmful bacteria.
I’ve found that rinsing the sprouts regularly also keeps them fresh and safe to eat. As long as you follow these simple guidelines, you can enjoy delicious, homegrown sprouts without worry!
What Should I Do if My Sprouts Smell Bad?
If my sprouts smell bad, I take immediate action. First, I rinse them thoroughly under cool water to remove any odor-causing bacteria.
If the smell persists, I discard the batch, as it’s a sign of spoilage.
I’ve learned that proper drainage and ventilation are crucial, so I make sure to adjust my sprouting method next time.
Keeping everything clean and monitoring moisture levels helps me avoid this issue in the future.
Can I Reuse Sprouting Equipment for Different Seeds?
Absolutely, you can reuse sprouting equipment for different seeds!
I always make sure to clean everything thoroughly between uses to prevent cross-contamination and any potential mold growth. A good rinse with warm water and a gentle scrub usually does the trick.
I’ve found that using separate jars or lids for different seeds helps keep track of my sprouting projects.
Just remember, some seeds may require different soaking times or conditions, so adjust accordingly!
Conclusion
In conclusion, sprouting is a simple yet rewarding process that opens up a world of nutritional benefits and culinary possibilities. By choosing the right seeds and following the steps I shared, you’ll consistently produce perfect sprouts. Remember to create the ideal environment and avoid common pitfalls to ensure success. Once you’ve harvested your sprouts, get creative in the kitchen! I hope you enjoy this journey toward healthier eating and discover the joy of sprouting for yourself.