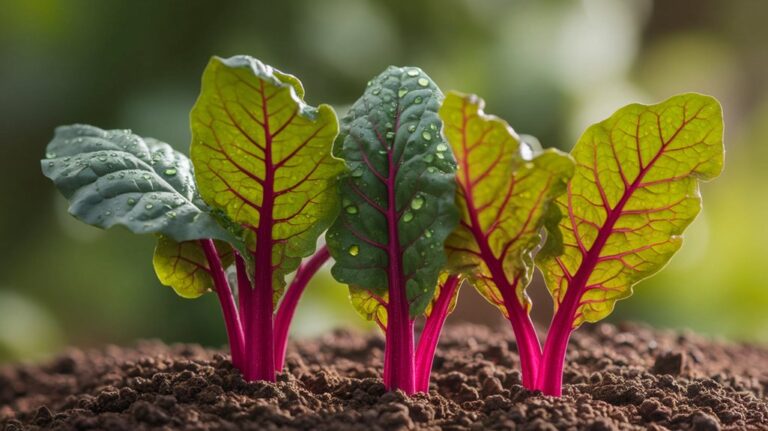
Best Way to Grow Sprouts
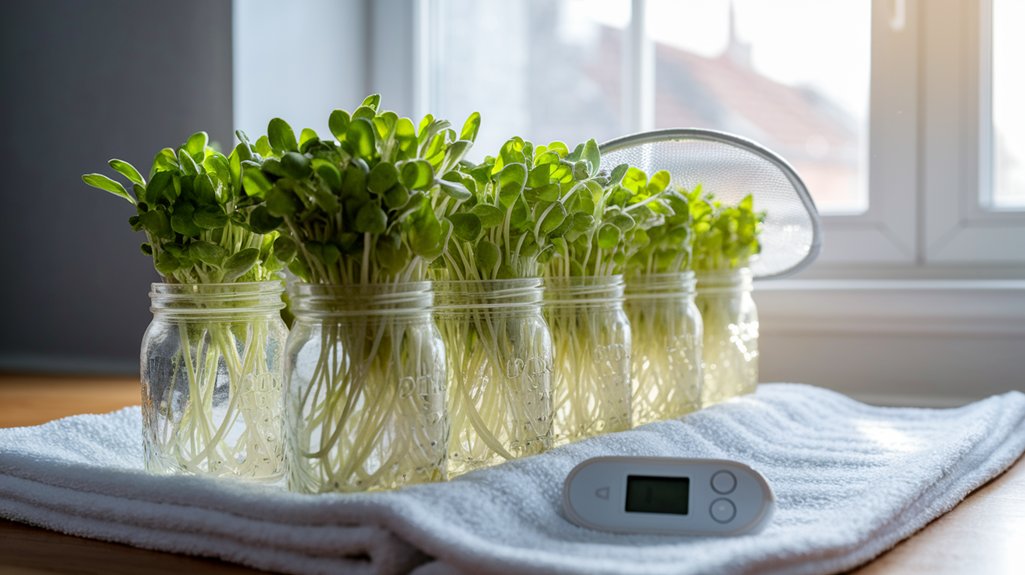
Growing sprouts is simple and rewarding. First, I choose organic seeds specifically for sprouting, like alfalfa or broccoli. For tools, a sprouting jar with a fine mesh lid works great. I keep my seeds moist, rinsing them 2-3 times daily while ensuring they stay at a temperature of 65°F to 75°F. Once my sprouts reach 1-2 inches, I harvest and store them in the fridge. If you’re curious about more tips on sprout care, I’ve got you covered!
Key Takeaways
- Choose high-quality organic seeds specifically labeled for sprouting to ensure better germination and nutrition benefits.
- Use a sprouting jar or specialized sprouter with proper airflow and drainage to promote healthy growth.
- Maintain an ideal temperature of 65°F to 75°F and moisture levels of 60-70% for optimal sprout development.
- Rinse sprouts 2-3 times daily to prevent mold and ensure they receive adequate moisture.
- Harvest sprouts when they reach 1-2 inches and store them in a breathable container in the refrigerator for freshness.
Choosing the Right Seeds for Sprouting
When it comes to choosing the right seeds for sprouting, I find that understanding the different types available can make all the difference in your success.
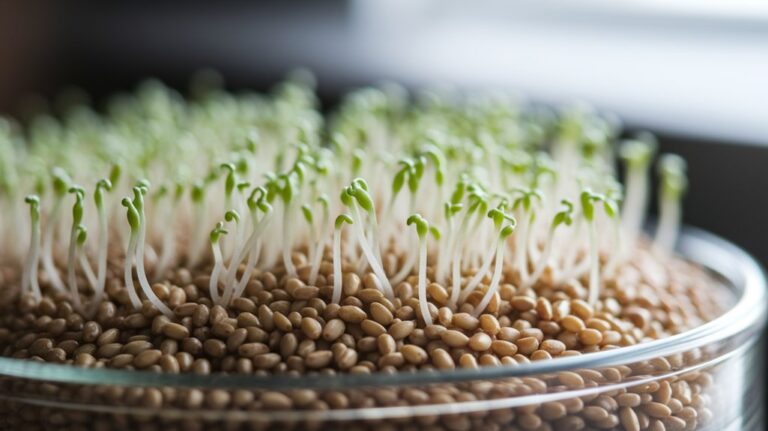
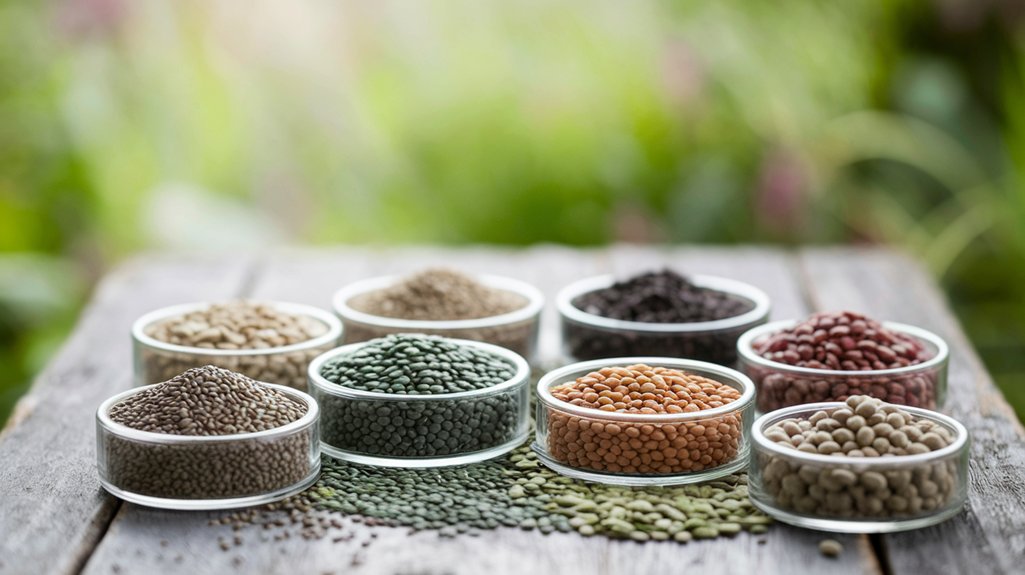
Sprouting seeds can include legumes like lentils and chickpeas, grains such as quinoa, and various leafy greens like alfalfa and broccoli. Each type has unique nutritional benefits; for instance, broccoli sprouts are rich in sulforaphane, a compound linked to cancer prevention.
It’s crucial to select seeds specifically labeled for sprouting, as culinary seeds may be treated with chemicals that inhibit growth. Additionally, organic seeds are preferable to avoid pesticides.
Always check for freshness, as older seeds may not germinate effectively. By choosing wisely, you’ll not only ensure a successful sprouting process but also enhance your dietary variety.
Essential Tools and Supplies
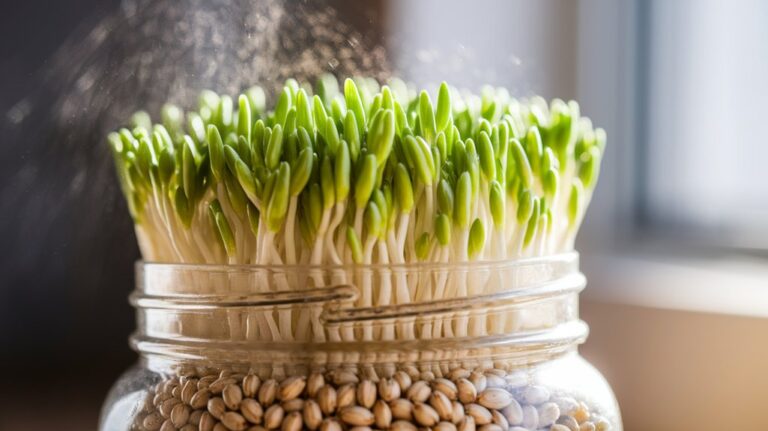
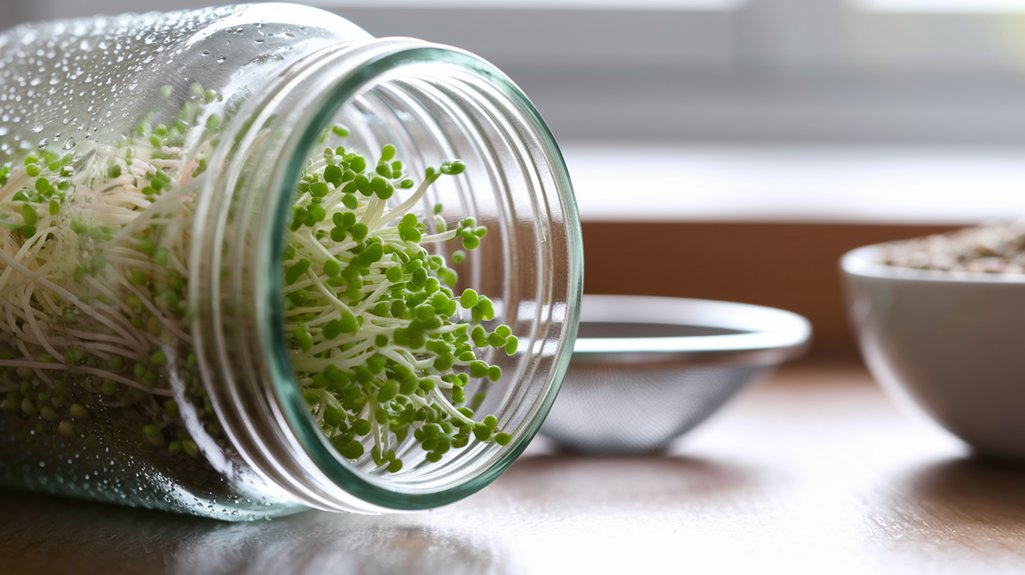
Selecting the right seeds is just the beginning; having the right tools and supplies is equally important for successful sprouting. I recommend starting with a sprouting jar or a specialized sprouter, as these allow for optimal airflow and drainage.
You’ll also need a fine mesh lid or cheesecloth to keep seeds secure while allowing moisture to escape. Water is crucial, so a measuring cup and a spray bottle help maintain consistent moisture levels without over-saturating.
A scale can ensure you’re using the correct seed-to-water ratio, promoting healthy growth. Lastly, a warm, dark space is vital for germination, so consider a designated area in your home.
With these tools, you’ll create the ideal environment for your sprouts to thrive.
Step-by-Step Guide to Sprouting
When I start sprouting, I always pay close attention to choosing the right seeds, as different varieties yield different flavors and nutrients.
I also ensure I’ve the proper sprouting equipment on hand, which is essential for success.
Finally, I focus on maintaining optimal conditions and harvesting at the right time to maximize the quality of my sprouts.
Choosing the Right Seeds
Choosing the right seeds is crucial for a successful sprouting experience, and I often recommend starting with organic varieties known for their germination rates.
Seeds like alfalfa, broccoli, and radish are excellent choices due to their quick sprouting and nutrient density. When selecting seeds, check for the “sprout” label, ensuring they’re free from pesticides and chemicals.
It’s also vital to consider the size and type of seeds; smaller seeds tend to sprout faster. Additionally, look for seeds that have been tested for germination, as this guarantees a higher success rate.
Always store your seeds in a cool, dry place to maintain their viability, which is key to producing healthy sprouts that are both delicious and nutritious.
Sprouting Equipment Needed
After you’ve picked the right seeds, the next step is gathering the necessary sprouting equipment. Here’s what you’ll need for a successful sprouting experience:
| Equipment | Purpose | Notes |
|---|---|---|
| Sprouting Jar | Holds seeds and water | Glass or BPA-free plastic |
| Lid with Holes | Allows air circulation | Mesh or perforated lid |
| Drainage Tray | Catches excess water | Optional but recommended |
Using a sprouting jar makes it easy to soak and rinse seeds, while the lid with holes ensures proper airflow. A drainage tray helps prevent mold by keeping excess moisture at bay. With these tools, you’ll be well on your way to sprouting success!
Maintenance and Harvesting Tips
Although sprouting may seem simple, maintaining your sprouts and knowing when to harvest them is crucial for optimal growth and flavor.
During the sprouting process, I’ve learned that a few key practices make all the difference:
- Rinse regularly: I rinse my sprouts 2-3 times daily to keep them moist and prevent mold.
- Monitor light: I place them in indirect sunlight for a few hours each day, which boosts chlorophyll production and enhances flavor.
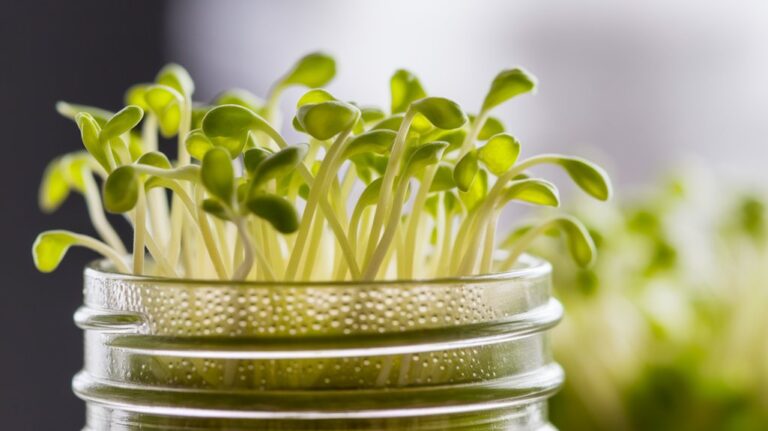
- Harvest at the right time: I wait until the sprouts have developed leaves and are about 1-2 inches long, as this is when they’re most nutritious and tasty.
Following these steps has helped me achieve a healthy and delicious batch of sprouts every time!
Maintaining Optimal Conditions
To grow healthy sprouts, I focus on maintaining optimal conditions, particularly the ideal temperature range of 60 to 75 degrees Fahrenheit.
Proper moisture levels are crucial too; I ensure the sprouts are consistently damp but not waterlogged.
Additionally, I pay attention to light requirements, as indirect sunlight fosters robust growth without causing overheating.
Ideal Temperature Range
While I’ve experimented with various methods of sprout cultivation, I’ve found that maintaining the ideal temperature range is crucial for optimal growth.
Sprouts thrive best in a temperature range of 65°F to 75°F (18°C to 24°C). If the temperature falls below this range, germination slows, while higher temperatures can lead to undesirable conditions.
Here are some key points to keep in mind:
- Germination: Seeds require warmth to sprout effectively, so maintaining the right temperature encourages quick germination.
- Enzyme Activity: Optimal temperatures enhance enzyme activity, promoting healthier growth.
- Pathogen Prevention: Cooler or excessively warm conditions can foster mold and bacteria, jeopardizing your sprouts’ health.
Proper Moisture Levels
Maintaining proper moisture levels is vital for sprout growth, and I’ve found that the right balance can make all the difference. Too much moisture can lead to mold, while too little can hinder sprout development. I usually aim for a moisture level of around 60-70%.
Here’s a quick reference table to help you understand moisture needs for various sprouts:
| Sprout Type | Ideal Moisture Level | Frequency of Watering |
|---|---|---|
| Alfalfa | 60-70% | Every 8-12 hours |
| Mung Bean | 65-75% | Every 8-12 hours |
| Broccoli | 60% | Every 12-24 hours |
| Radish | 65% | Every 8-12 hours |
| Lentil | 70% | Every 12-24 hours |
Light Requirements for Growth
Light plays a crucial role in the growth of sprouts, as it drives the process of photosynthesis, which fuels their development.
I’ve found that providing the right light conditions is essential for achieving healthy, vibrant sprouts.
Here are some key light requirements you should consider:
- Duration: Aim for 12-16 hours of light daily to ensure optimal growth.
- Intensity: Use bright, indirect light; too much direct sunlight can scorch delicate sprouts.
- Type: Consider using fluorescent or LED grow lights, which are energy-efficient and effective for indoor sprouting.
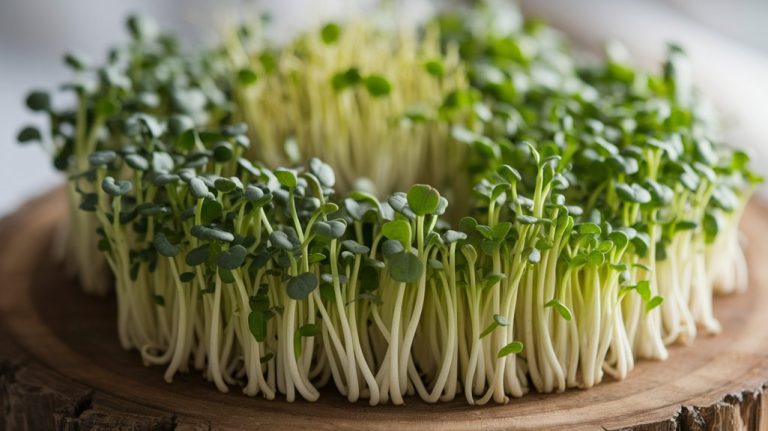
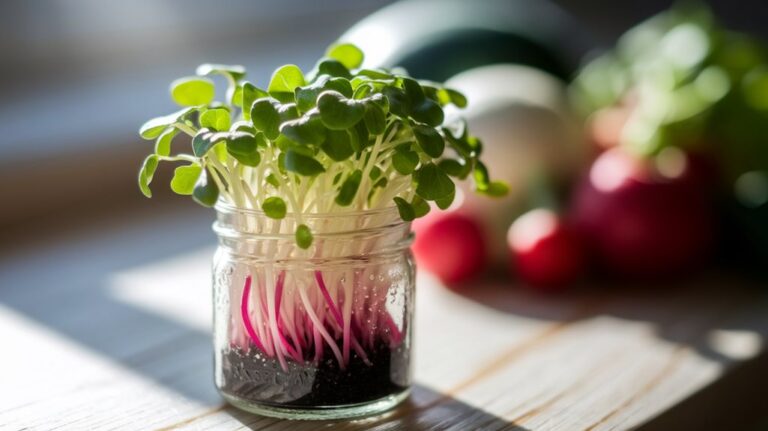
Harvesting and Storing Your Sprouts
As soon as your sprouts reach the desired length, it’s crucial to harvest them promptly to ensure optimal flavor and nutritional value.
I typically cut my sprouts just above the growing medium using clean scissors or a sharp knife. This method minimizes damage and contamination.
After harvesting, I rinse them thoroughly under cool running water to remove any residual soil or debris, then gently pat them dry with a clean cloth or paper towel.
For storage, I place the sprouts in a breathable container, like a glass jar or a perforated bag. Keeping them in the refrigerator helps maintain their crispness.
Remember to consume your sprouts within a week for the best taste and nutrient retention; freshness is key to enjoying their benefits!
Delicious Ways to Incorporate Sprouts Into Your Meals
While sprouts are often overlooked, they can truly elevate your meals with their unique textures and flavors.
I love adding sprouts to my dishes for a nutritious boost and a delightful crunch. They’re packed with vitamins, minerals, and enzymes that aid digestion and enhance flavor profiles.
Here are a few delicious ways to incorporate them into your meals:
- Salads: Toss a handful of alfalfa or broccoli sprouts into your leafy greens for an added crunch.
- Sandwiches: Layer radish sprouts in your sandwiches for a peppery taste that complements various fillings.
- Stir-fries: Add mung bean sprouts at the end of cooking for a fresh texture without losing nutrients.
These simple additions can transform your meals, making them healthier and more exciting.
Frequently Asked Questions
Can I Grow Sprouts Without Soil or Sunlight?
Absolutely, you can grow sprouts without soil or sunlight!
I often use a simple jar method. I soak seeds in water for a few hours, then drain and rinse them. I place the jar at an angle to allow excess water to escape, ensuring good airflow.
I rinse the seeds every day, keeping them moist but not soggy. In about 5 to 7 days, I’ve got fresh, nutritious sprouts ready to enjoy!
How Long Do Sprouts Typically Last After Harvesting?
After harvesting, sprouts typically last about 5 to 7 days when stored properly.
I always keep mine in the refrigerator, in a breathable container to prevent moisture buildup.
If you notice any signs of wilting or off smells, you should toss them out.
I find that eating them fresh within a few days ensures the best flavor and nutritional value.
Are There Any Health Risks Associated With Eating Sprouts?
I’ve often wondered about the health risks linked to eating sprouts.
It turns out, raw sprouts can harbor harmful bacteria like E. coli and Salmonella. These pathogens thrive in the warm, moist conditions that sprouts need to grow.
To minimize risk, I always wash them thoroughly and consider cooking them, which kills any bacteria.
While sprouts are nutritious, I think it’s essential to be cautious and informed about food safety.
Can I Sprout Seeds That Are Past Their Expiration Date?
I often wonder if I can sprout seeds that are past their expiration date. While it’s possible, the seeds mightn’t have the same germination rate or viability.
Over time, moisture levels and seed quality decline, affecting the chances of successful sprouting. I’ve found it’s best to use fresh seeds for consistent results.
If I experiment with expired seeds, I’ll keep my expectations realistic and monitor their progress closely.
What Are the Best Seeds for Beginners to Start Sprouting?
When I started sprouting, I found that alfalfa, mung beans, and broccoli seeds were the best choices for beginners. They sprout quickly and are easy to manage.
Alfalfa seeds typically germinate in about 3-5 days, while mung beans can sprout in just 2-3 days.
Broccoli seeds not only grow well but also offer great nutritional benefits.
I recommend sticking to these varieties to ensure a successful and enjoyable sprouting experience right from the start.
Conclusion
In conclusion, growing sprouts is not only simple, but it’s also a rewarding endeavor for your health and culinary creativity. By selecting the right seeds, using the proper tools, and maintaining optimal conditions, you’ll cultivate nutrient-rich sprouts in no time. Remember to harvest and store them correctly to maximize freshness. Incorporating these little powerhouses into your meals can elevate both flavor and nutrition. So, why not give sprouting a try? Your taste buds and body will thank you!