How to Grow Backwheat Microgreens
To grow buckwheat microgreens, I start with high-quality organic seeds and a sterilized soil-less mix like coconut coir. I scatter about 1 ounce of seeds in a tray, press them lightly into the soil, and mist to aid germination. Providing 12-16 hours of indirect sunlight and maintaining humidity is key. I harvest them at 4-6 inches tall using scissors. Once you understand the basics, you’ll discover even more tips and tricks for success.
Key Takeaways
- Select high-quality, organic buckwheat seeds and prepare a sterile, well-draining soil-less mix for optimal growth conditions.
- Scatter about 1 ounce of seeds evenly on the soil surface, press gently, and mist lightly to promote germination.
- Provide 12-16 hours of indirect sunlight, maintain temperatures between 65-75°F, and ensure high humidity until germination occurs.
- Harvest microgreens when they reach 4-6 inches tall, using sharp scissors to cut just above the soil line for best flavor.
- Store harvested microgreens in an airtight container in the refrigerator, using a damp paper towel to maintain moisture and freshness.
Understanding Buckwheat Microgreens
When I first discovered buckwheat microgreens, I was amazed by their vibrant flavor and nutritional benefits. These tiny greens pack a punch, offering a rich source of antioxidants, vitamins, and minerals.
They’re not just delicious; they’re also gluten-free and perfect for anyone looking to enhance their diet. What really surprised me was how quickly they grow—usually within 7 to 14 days.
Their unique, slightly nutty taste adds a delightful crunch to salads and sandwiches. Plus, they’re incredibly easy to grow indoors or outdoors, making them accessible for anyone, regardless of gardening experience.
Understanding these aspects has made me appreciate buckwheat microgreens even more, and I can’t wait for you to experience them too!
Selecting the Right Seeds
Choosing the right seeds for buckwheat microgreens is crucial to achieving a bountiful harvest. I always select high-quality, organic seeds to ensure the best flavor and nutritional value. When browsing options, I keep the following factors in mind:
| Seed Type | Key Features |
|---|---|
| Organic Buckwheat | Non-GMO, rich in nutrients |
| Raw Seeds | Fresh, unprocessed, viable |
| Heirloom Varieties | Unique flavors, diverse growth |
I prefer organic seeds as they’re free from pesticides and chemicals. Additionally, checking for freshness guarantees better germination rates. By selecting the right seeds, I set the foundation for thriving and delicious microgreens, ready to elevate any dish!
Preparing Your Growing Medium
When it comes to growing buckwheat microgreens, choosing the right growing medium is crucial for success.
I always make sure to sterilize my materials before planting, as this helps prevent any unwanted pests or diseases.
Let’s explore the best options for your growing medium and how to prepare them effectively.
Selecting the Right Medium
Selecting the right medium for growing buckwheat microgreens is crucial for achieving healthy, vibrant plants. I’ve found that a quality soil-less mix, like coconut coir or peat moss, works wonders. These materials provide excellent drainage while retaining just enough moisture, which is key for buckwheat’s growth.
You can also use seed starting mix; just ensure it’s free from additives that might hinder germination. I prefer to avoid heavy soils since they can compact and suffocate the delicate roots.
If you’re feeling adventurous, try using a hydroponic setup with a foam or mat designed for microgreens. Whichever medium you choose, make sure it’s lightweight and allows for good air circulation. This way, your buckwheat microgreens will thrive beautifully!
Sterilizing Growing Materials
After you’ve picked the right growing medium for your buckwheat microgreens, the next step is to ensure it’s free from harmful pathogens and pests.
Sterilizing your growing materials is crucial for a successful harvest. Here’s how I do it:
- Heat Treatment: Bake the soil in an oven at 180°F (82°C) for 30 minutes.
- Steam Sterilization: Use a pressure cooker to steam the medium at 15 psi for 30 minutes.
- Chemical Disinfectants: Mix a solution of hydrogen peroxide and water, soaking the material for 10 minutes.
- UV Light Exposure: If you have access to a UV sterilizer, expose your medium for 15-20 minutes.
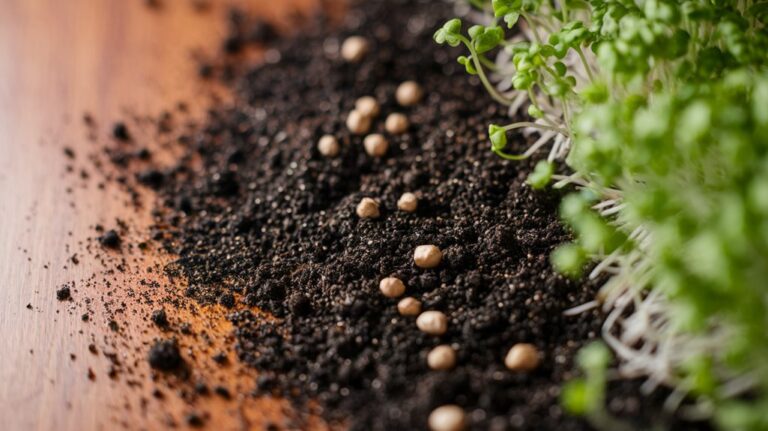
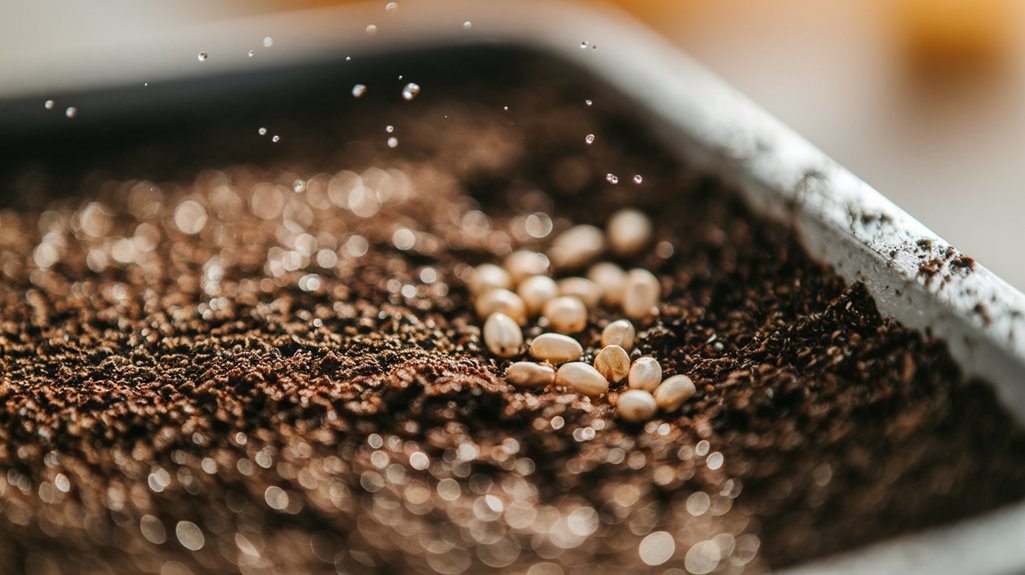
Sowing the Seeds
Sowing buckwheat microgreen seeds is an exciting step in your growing journey. I recommend starting with high-quality seeds for the best results. Here’s a quick guide to help you along the way:
| Step | Description |
|---|---|
| Prepare Tray | Fill with sterile soil, level it out. |
| Seed Density | Use about 1 ounce of seeds per tray. |
| Even Spreading | Scatter seeds evenly across the surface. |
| Light Pressure | Gently press seeds into the soil with a flat board. |
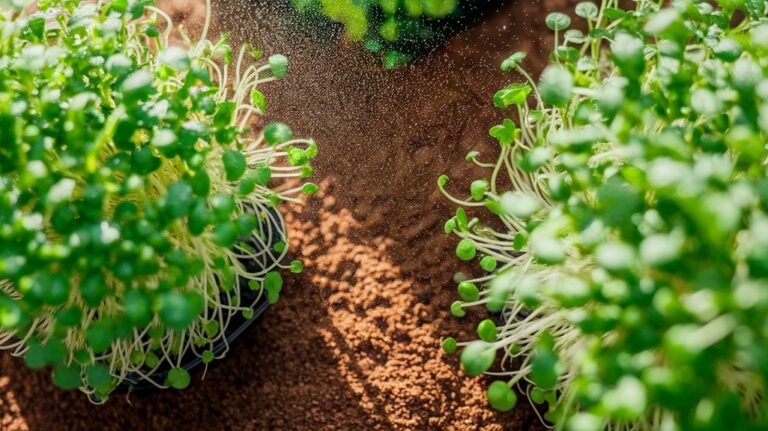
Once you’ve sown the seeds, mist the surface lightly with water. This helps them settle and kickstarts the germination process. You’re one step closer to enjoying fresh, nutritious microgreens!
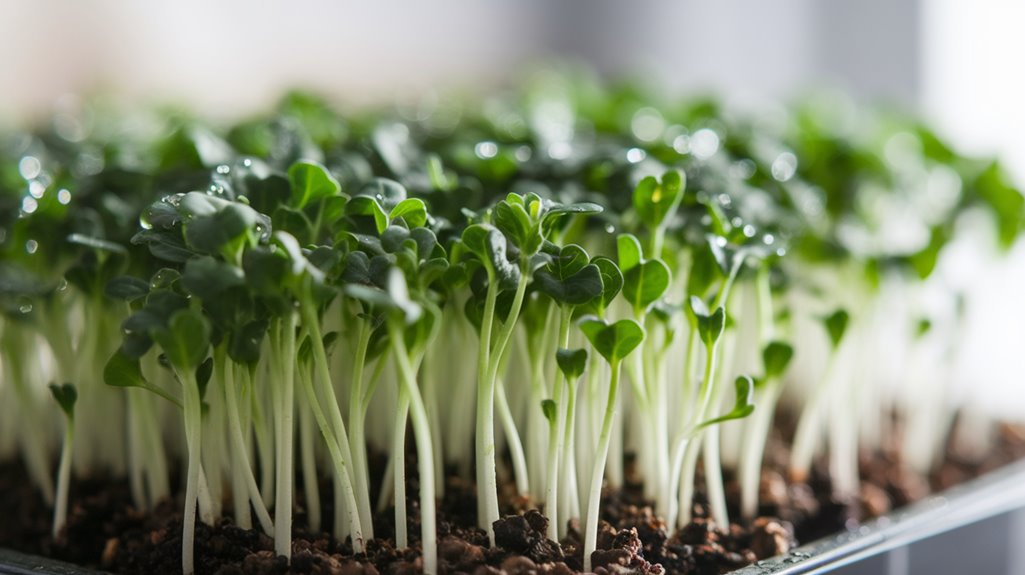
Providing Optimal Growing Conditions
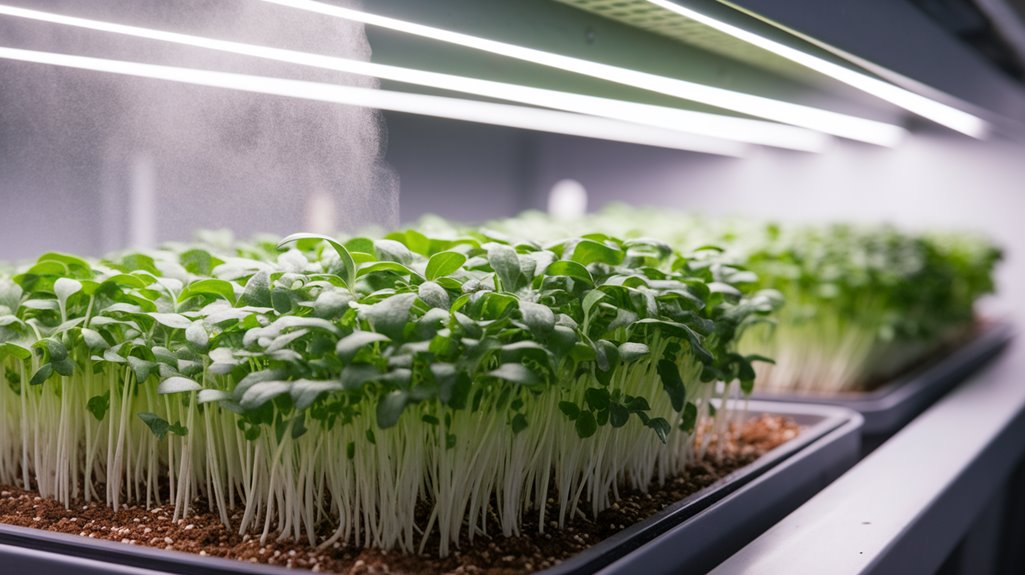
Once I’ve sown the seeds, it’s time to focus on providing the optimal growing conditions for my buckwheat microgreens.
Creating the right environment is essential for healthy growth. Here’s what I pay attention to:
- Light: I ensure they get plenty of indirect sunlight or use grow lights for about 12-16 hours daily.
- Temperature: I maintain a temperature between 65-75°F (18-24°C) to encourage sprouting.
- Humidity: I keep the humidity levels high by covering the trays with a lid or plastic wrap until they germinate.
- Air Circulation: I make sure there’s good airflow around the trays to prevent mold and promote strong stems.
Watering and Maintenance
When it comes to watering and maintaining my buckwheat microgreens, I’ve found that understanding the right frequency is key to their health.
I also keep a close eye on soil moisture to ensure they don’t get too dry or too soggy.
Plus, good drainage and airflow are essential for preventing mold and promoting strong growth.
Optimal Watering Frequency
I’ve found that maintaining the right watering frequency is crucial for growing healthy buckwheat microgreens.
Too much or too little water can hinder their growth, so I’ve developed a simple routine that works for me.
Here are my top tips for optimal watering frequency:
- Water daily: Buckwheat microgreens thrive with consistent moisture.
- Check the soil: Feel the top layer; if it’s dry, it’s time to water.
- Use a spray bottle: This prevents over-saturation and promotes even moisture.
- Observe growth: Adjust frequency based on how quickly they sprout; faster growth may need more water.
Soil Moisture Monitoring
Here’s a quick reference table to help you gauge soil moisture:
| Moisture Level | Appearance | Action Needed |
|---|---|---|
| Too Dry | Cracked, dusty soil | Water immediately |
| Ideal | Slightly damp | Maintain current level |
| Too Wet | Muddy, pooling water | Reduce watering |
Drainage and Airflow
While cultivating buckwheat microgreens, ensuring proper drainage and airflow is crucial for their health and growth. Without it, you risk mold and root rot.
Here are four key tips to enhance drainage and airflow:
- Choose the Right Tray: Use a tray with drainage holes to prevent water accumulation.
- Soil Depth: Keep the soil depth around 1-2 inches to promote airflow while retaining moisture.
- Spacing Seeds: Don’t overcrowd your seeds; adequate spacing allows for better airflow among them.
- Ventilation: Place your microgreens in a well-ventilated area, or use a fan to encourage airflow, especially in humid conditions.
Monitoring Growth Progress
As you embark on the journey of growing buckwheat microgreens, keeping a close eye on their growth progress is crucial for achieving a healthy yield.
I find it helpful to check on them daily, noting changes in color and height. Typically, buckwheat microgreens sprout within 2-3 days, and I look for vibrant green leaves, indicating they’re thriving.
It’s also important to monitor the moisture level; they shouldn’t be too dry or overly soggy. Adjusting the light exposure is key, too—too much light can cause the seedlings to become leggy.
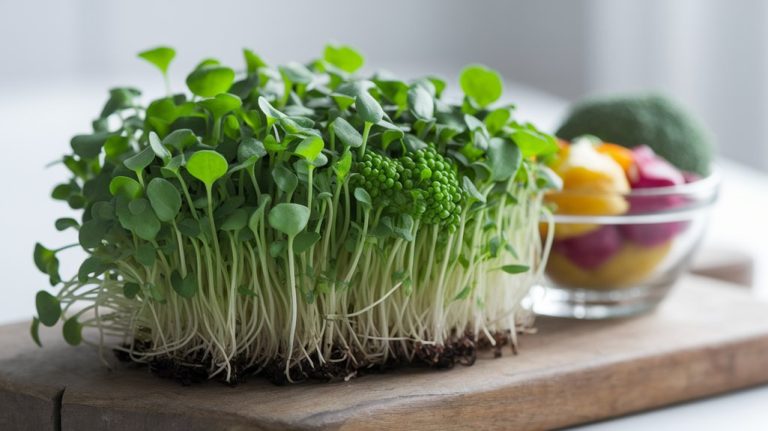
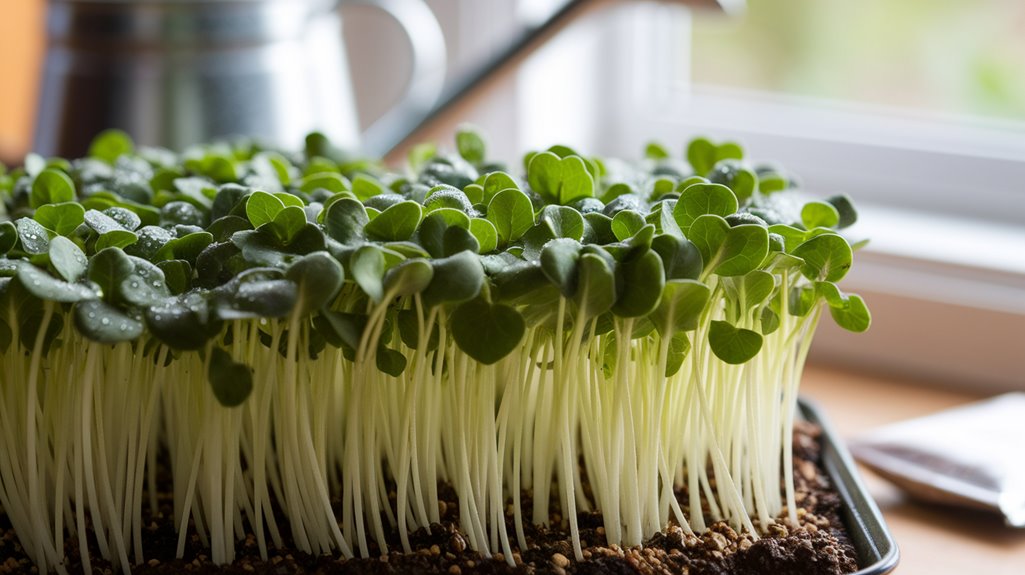
Harvesting Your Microgreens
When the time comes to harvest your buckwheat microgreens, it’s essential to do it at just the right moment for optimal flavor and texture. Typically, you’ll want to harvest them when they’re about 4-6 inches tall, just before they start to flower.
Here’s how I do it:
- Gather your tools – A sharp pair of scissors or a knife works best.
- Choose the right time – Early morning or late afternoon is ideal for harvesting.
- Cut carefully – Snip the greens just above the soil line to avoid any dirt.
- Handle gently – Place the harvested greens in a clean container, avoiding any bruising.
With these steps, you’ll enjoy fresh, flavorful microgreens that enhance your meals beautifully!
Storing and Using Buckwheat Microgreens
Now that you’ve harvested your buckwheat microgreens, it’s essential to store them properly to maintain their freshness and flavor.
I’ll share some effective storage techniques and delicious culinary ideas that will help you make the most of your microgreens.
Let’s explore how to keep them vibrant and tasty for all your meals!
Proper Storage Techniques
Storing buckwheat microgreens properly is essential to maintain their freshness and nutritional value. I’ve found that following a few simple techniques can really make a difference.
- Refrigerate: Keep your microgreens in the fridge to slow down their aging process.
- Use a damp paper towel: Place a damp paper towel in the container with the microgreens to maintain moisture without making them soggy.
- Seal tightly: Store them in an airtight container to prevent them from wilting or absorbing odors from other foods.
- Consume quickly: Ideally, enjoy your microgreens within a week for the best taste and nutrients.
Culinary Uses Ideas
While I love the versatility of buckwheat microgreens, I’m always excited to discover new ways to incorporate them into my meals. These tiny greens have a nutty flavor that enhances many dishes.
I often toss them into salads for a fresh crunch or blend them into smoothies for an added nutritional boost. They’re also fantastic as a topping on avocado toast or in grain bowls, bringing a pop of color and texture.
For a unique twist, I sprinkle them on tacos or use them as a garnish for soups. When I store them properly, they last a week in the fridge, ensuring I always have them on hand for culinary creativity!
Troubleshooting Common Issues
Even though growing buckwheat microgreens can be a rewarding experience, you might encounter a few common issues along the way.
Here are some troubleshooting tips I’ve found helpful:
- Poor Germination: Ensure your seeds are fresh and soak them for a few hours before planting.
- Mold Growth: Keep your growing area well-ventilated and avoid overwatering to prevent excess moisture.
- Leggy Growth: If your microgreens are stretching too much, they might need more light. Consider moving them closer to a light source.
- Bitter Taste: This can happen if your microgreens grow too long. Harvest them at around 10-14 days for the best flavor.
Frequently Asked Questions
Conclusion
In conclusion, growing buckwheat microgreens is a rewarding and straightforward process that can enhance both your meals and your health. By selecting quality seeds, preparing the right medium, and providing the proper care, you’ll soon enjoy a vibrant crop of nutritious greens. Remember to monitor their growth and tackle any issues that arise. With a little patience and attention, you’ll have fresh microgreens ready to elevate your dishes in no time! Happy gardening!