In this lesson:
- How to tell root hairs from mold
- What to do about low germination
- How to fix bitterness, tough texture, wilting and other problems
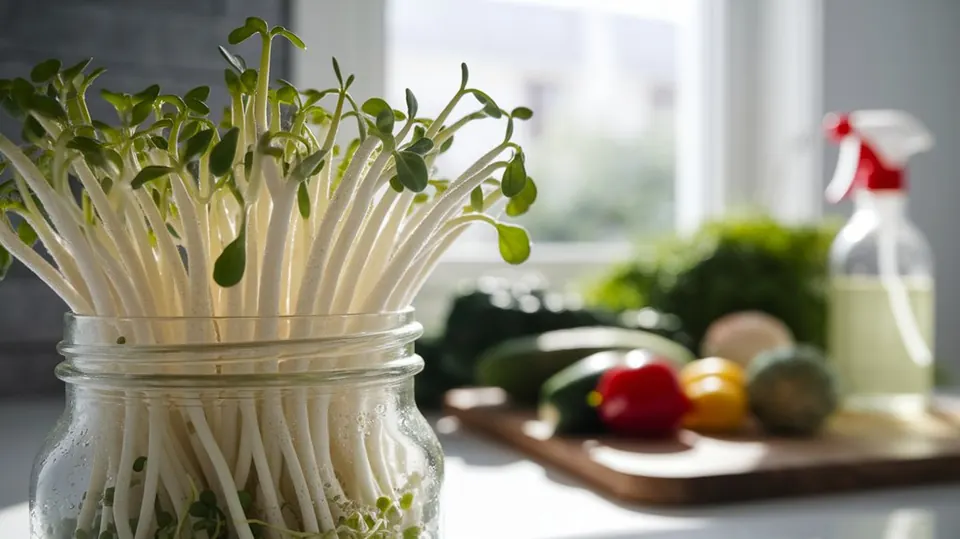
Root hairs vs mold
This is the most common worry, and it's a fair one. Both look like white fuzz.
| Root hairs | Mold | |
|---|---|---|
| Where | Only on the root tips and tails | In patches on seeds, hulls or clumps, or on stems |
| Look | Fine, soft, white, like cotton fluff or tiny hairs growing out in all directions | Cobweb-like or fuzzy patches. White, grey, green, black or pink |
| Smell | Clean, no odour | Musty, earthy, like a damp basement |
| When you mist it | Hairs collapse, flatten and seem to disappear | Fuzz stays, or it may look wetter |
| Where it spreads | Evenly along the roots | In pockets, around clumped or dead seeds |
| Safe? | Harmless | Throw out the batch |
How to check
- Take the jar to a bright spot.
- Spray or pour a little cool water onto the fuzz.
- Look closely. Do the hairs flatten and look like tiny, clear threads attached to each root tip? That's root hairs.
- Smell the jar. Any musty odour means mold.
- Look for spots away from the root tips, or any grey, green, black or pink colours. That's mold.
When root hairs show up
Root hairs appear when the air is humid and the sprouts are well watered. They are a sign the sprout is happy. They can look alarming, and they're more common in beans and in radish and broccoli sprouts.
What to do about mold
- Throw the batch out. Don't wash it or cut away the moldy part. Mold spores are invisible and spread.
- Wash the jar, lid and anything the batch touched in hot soapy water. Run through a hot dishwasher cycle if possible.
- Check your seed. Is it musty or damp? If so, replace it.
- Next batch: use less seed, drain better, and make sure air moves around the jar.
If you can't tell
Throw it out. A new batch costs a few cents and takes a few minutes.
Low or no germination
Symptoms
- Fewer than about 8 in 10 seeds sprout
- No seeds sprout at all
- Seeds look swollen, but nothing grows
- Seeds smell rotten
Causes and fixes
| Cause | Fix |
|---|---|
| Old seed | Test germination (Lesson 3). Replace old seed. |
| Seed stored in heat or damp | Store cool, dry and dark |
| Soaked too long | Follow soak times; use the shorter end in summer |
| Water too hot or too cold | Use cool tap water |
| Treated or garden seed | Use seed sold for sprouting |
| Split or broken beans | Pick through dry beans before you soak them |
| Too cold a room | Move the jar somewhere warmer, up to 75°F (24°C) |
If seeds don't sprout and begin to smell, throw the batch away. Dead seed rots, and it spoils the whole jar.
Other problems
Sprouts taste bitter
Causes: Grown too long; too warm; bean sprouts exposed to light; seed variety (radish is naturally spicy).
Fix: Harvest earlier. Keep bean sprouts in the dark. Don't let leafy sprouts sit in direct sun.
Bean sprouts are tough or stringy
Cause: Left too long.
Fix: Harvest when tails are about ½ to 1 inch for lentils, or 1–2 inches for mung beans. Cooking also softens them.
Sprouts are short and stubby
Causes: Too cool; too little water; weak seed.
Fix: Warm the room slightly, rinse a bit more often, and check your germination rate.
Sprouts are long, thin and pale
Causes: Too warm or too long in the dark.
Fix: Harvest earlier. For leafy sprouts, a few hours of indirect light thickens and greens them up.
Sprouts are wilting or drying out
Cause: Not enough rinsing, especially in a warm or dry room.
Fix: Rinse more often. Add a third rinse in the afternoon.
Sprouts form a solid mat
Cause: Too much seed.
Fix: Use less seed next time. For now, split the batch into two jars.
Water pools at the bottom of the jar
Cause: Poor angle or a clogged lid.
Fix: Prop the jar at a steeper angle, shake gently and check the mesh isn't blocked with hulls.
Lots of hulls
Cause: Normal for small seeds.
Fix: Float them off in a bowl of water at harvest (Lesson 6).
Fruit flies around the jar
Cause: Spilled water and sprouts attract them.
Fix: Wipe up spills. Put the jar in a spot away from fruit. Use a tight-fitting mesh lid.
Uneven growth
Cause: Normal. Some seeds just sprout slowly.
Fix: Harvest when most sprouts are ready. Throw away unsprouted seeds.
Quick diagnostic chart
Use this when something looks wrong and you don't know why.
| First question | If yes | If no |
|---|---|---|
| Does it smell sour, musty or rotten? | Lesson 8 — likely toss | Next question |
| Is it slimy? | Toss | Next question |
| Is there fuzz away from the root tips? | Mold — toss | Next question |
| Is the fuzz only on the root tips and smell-free? | Root hairs — fine | Next question |
| Are few seeds sprouting? | Check seed age and storage | Next question |
| Does it taste bitter? | Harvest earlier, keep dark | Fine |
Do this now
- Re-read the root hair vs mold table. Then check your current batch.
- Run a germination test on any seed that has been sitting for more than a year.
- Add a "problems" column to your batch log.
Key takeaways
- Root hairs: only on root tips, no smell, flatten with water. Mold: patchy, musty, doesn't flatten.
- If you can't tell, throw it out.
- Most poor sprouting comes from old seed or the wrong temperature.
- Almost every other problem is solved by less seed, better draining or earlier harvest.

Written by Michael
A passionate sprouting professional sharing practical tips for growing sprouts and microgreens at home. More about Michael